Administrator guide
How to run your Cravit Gateway console: sign in, give colleagues access, and decide what the AI may do in your Odoo. Everything here affects your organisation only.
Your console address (https://yourcompany.cravitgateway.com/admin/ui) and your admin key (starting cga_). You create the key yourself with one button, right after confirming your email; it is shown once and is never in an email. Store it in a password manager: it cannot be recovered afterwards, only replaced.
1. Signing in for the first time
After the sign-up form you receive one mail: Confirm your email. Its button creates your gateway and takes you straight to the page below. Closed the tab? The same mail brings you back until your key exists.
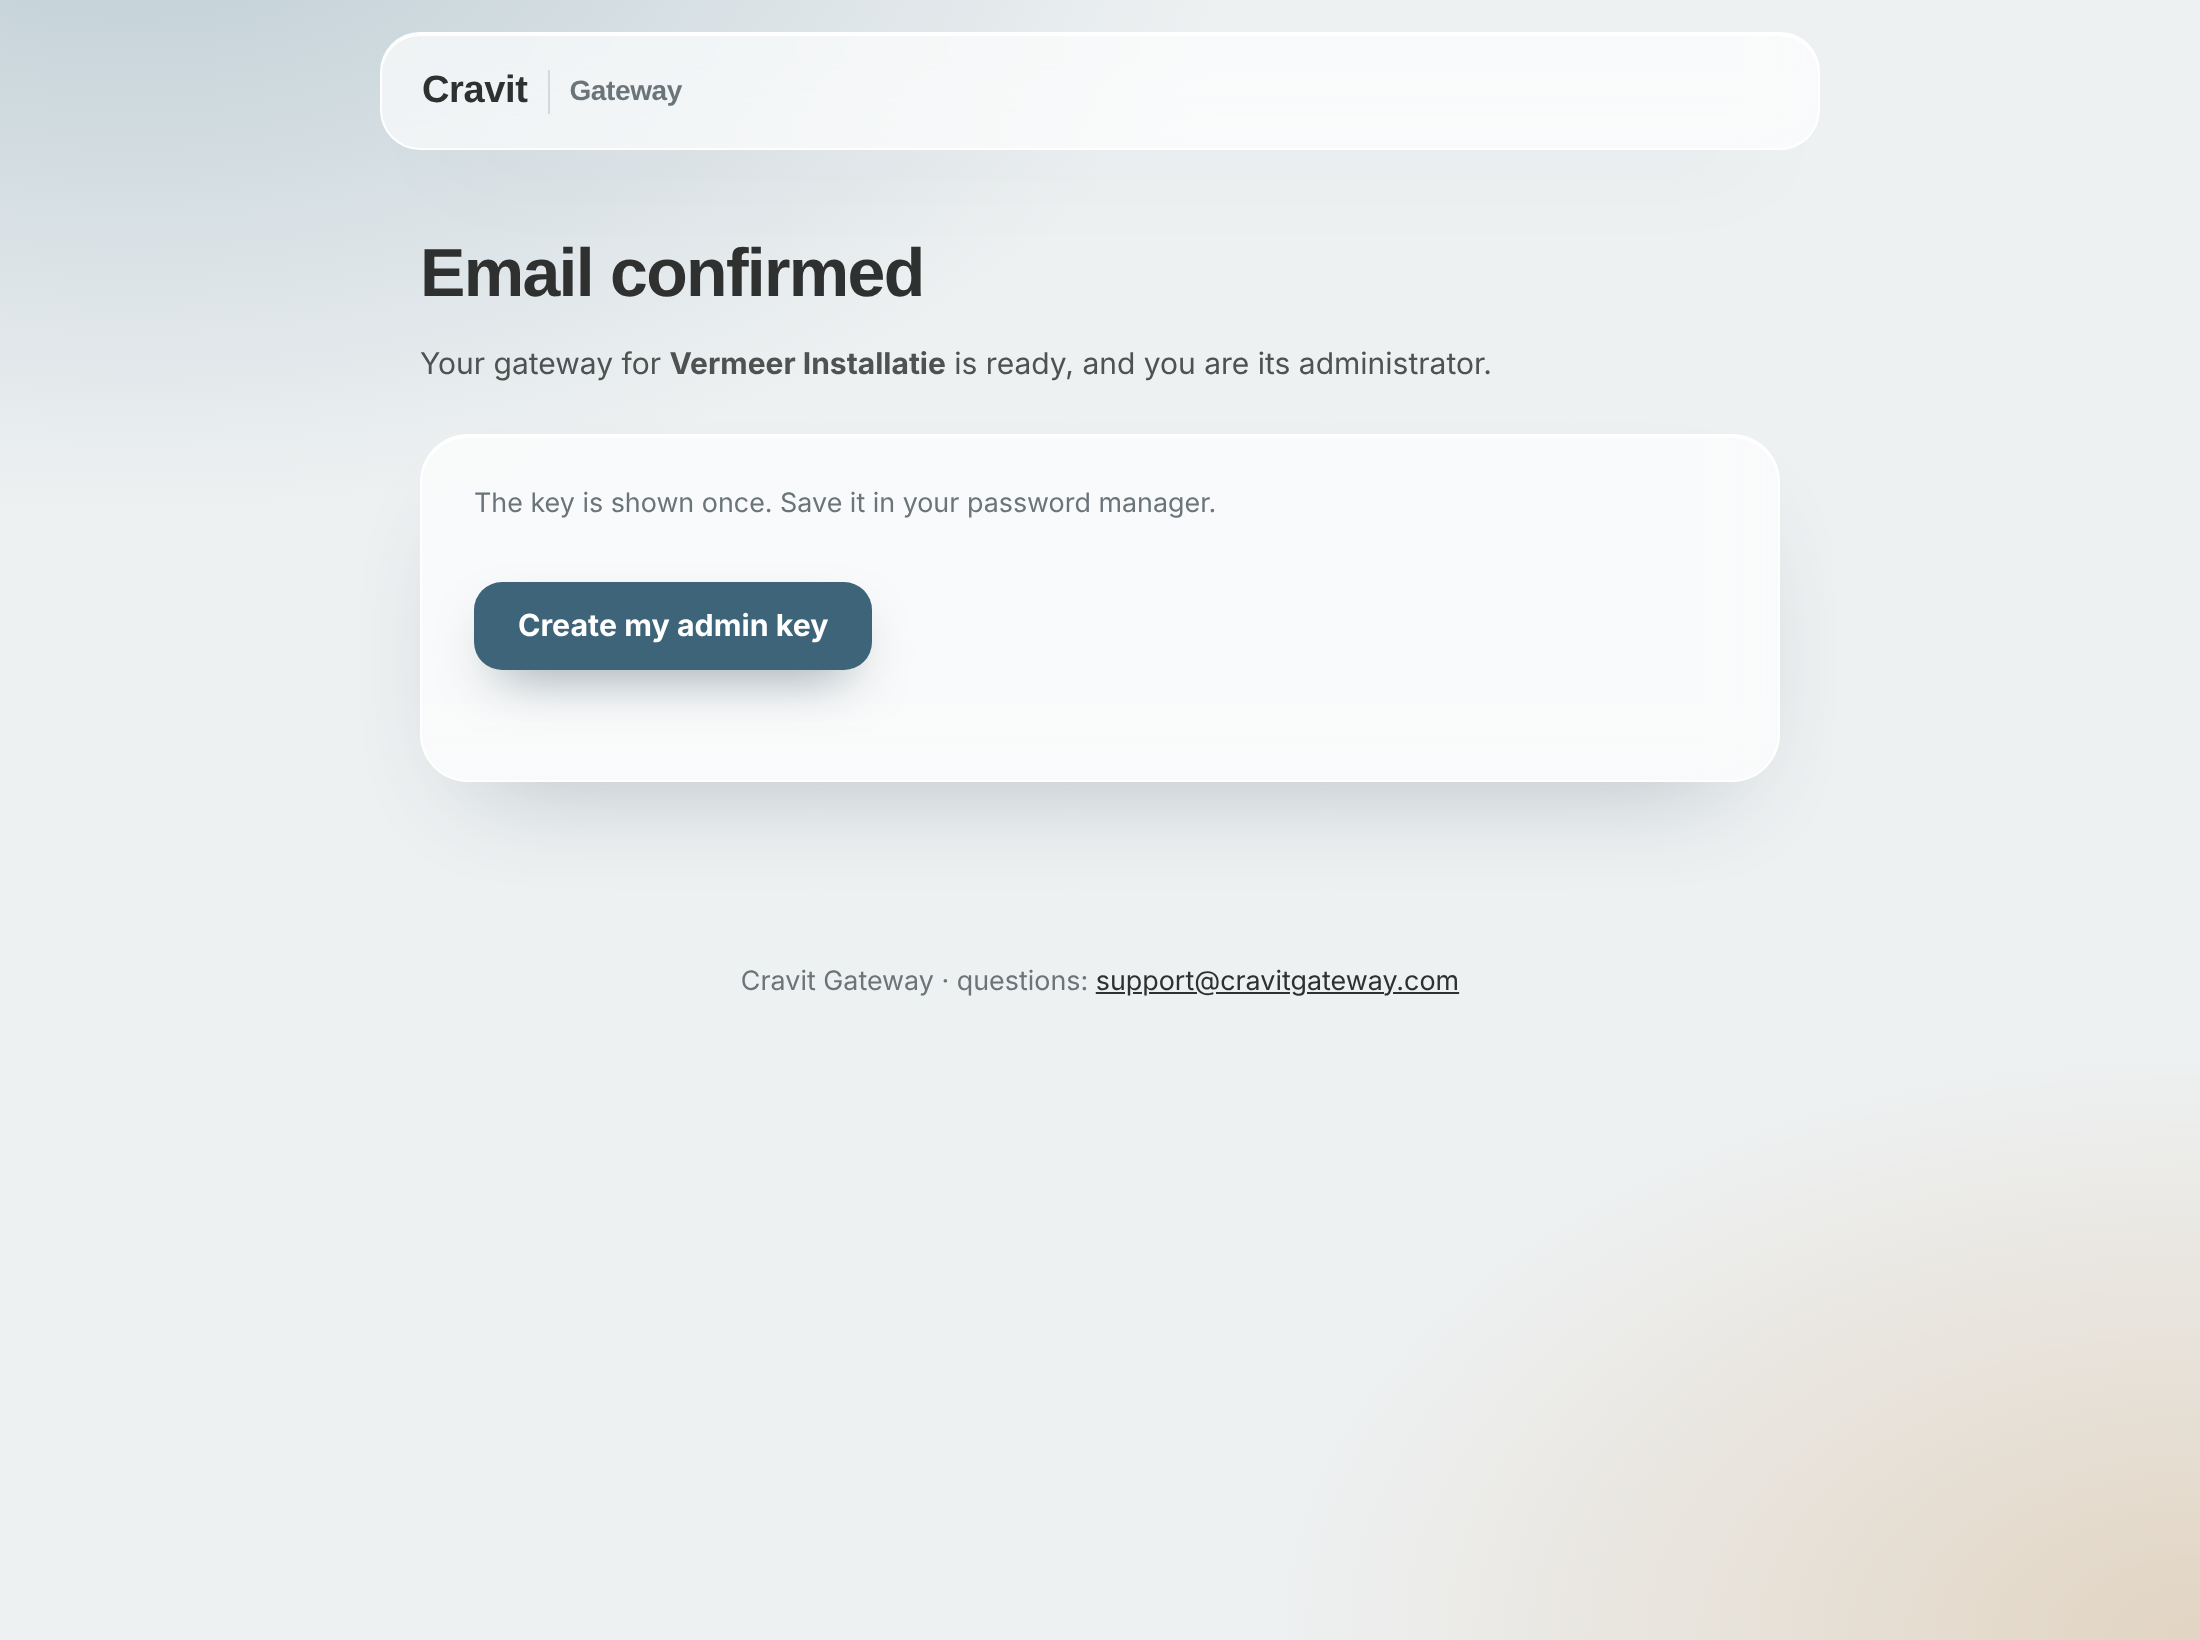
- Click Create my admin key. Your key is created at that moment and shown once — copy it into your password manager.
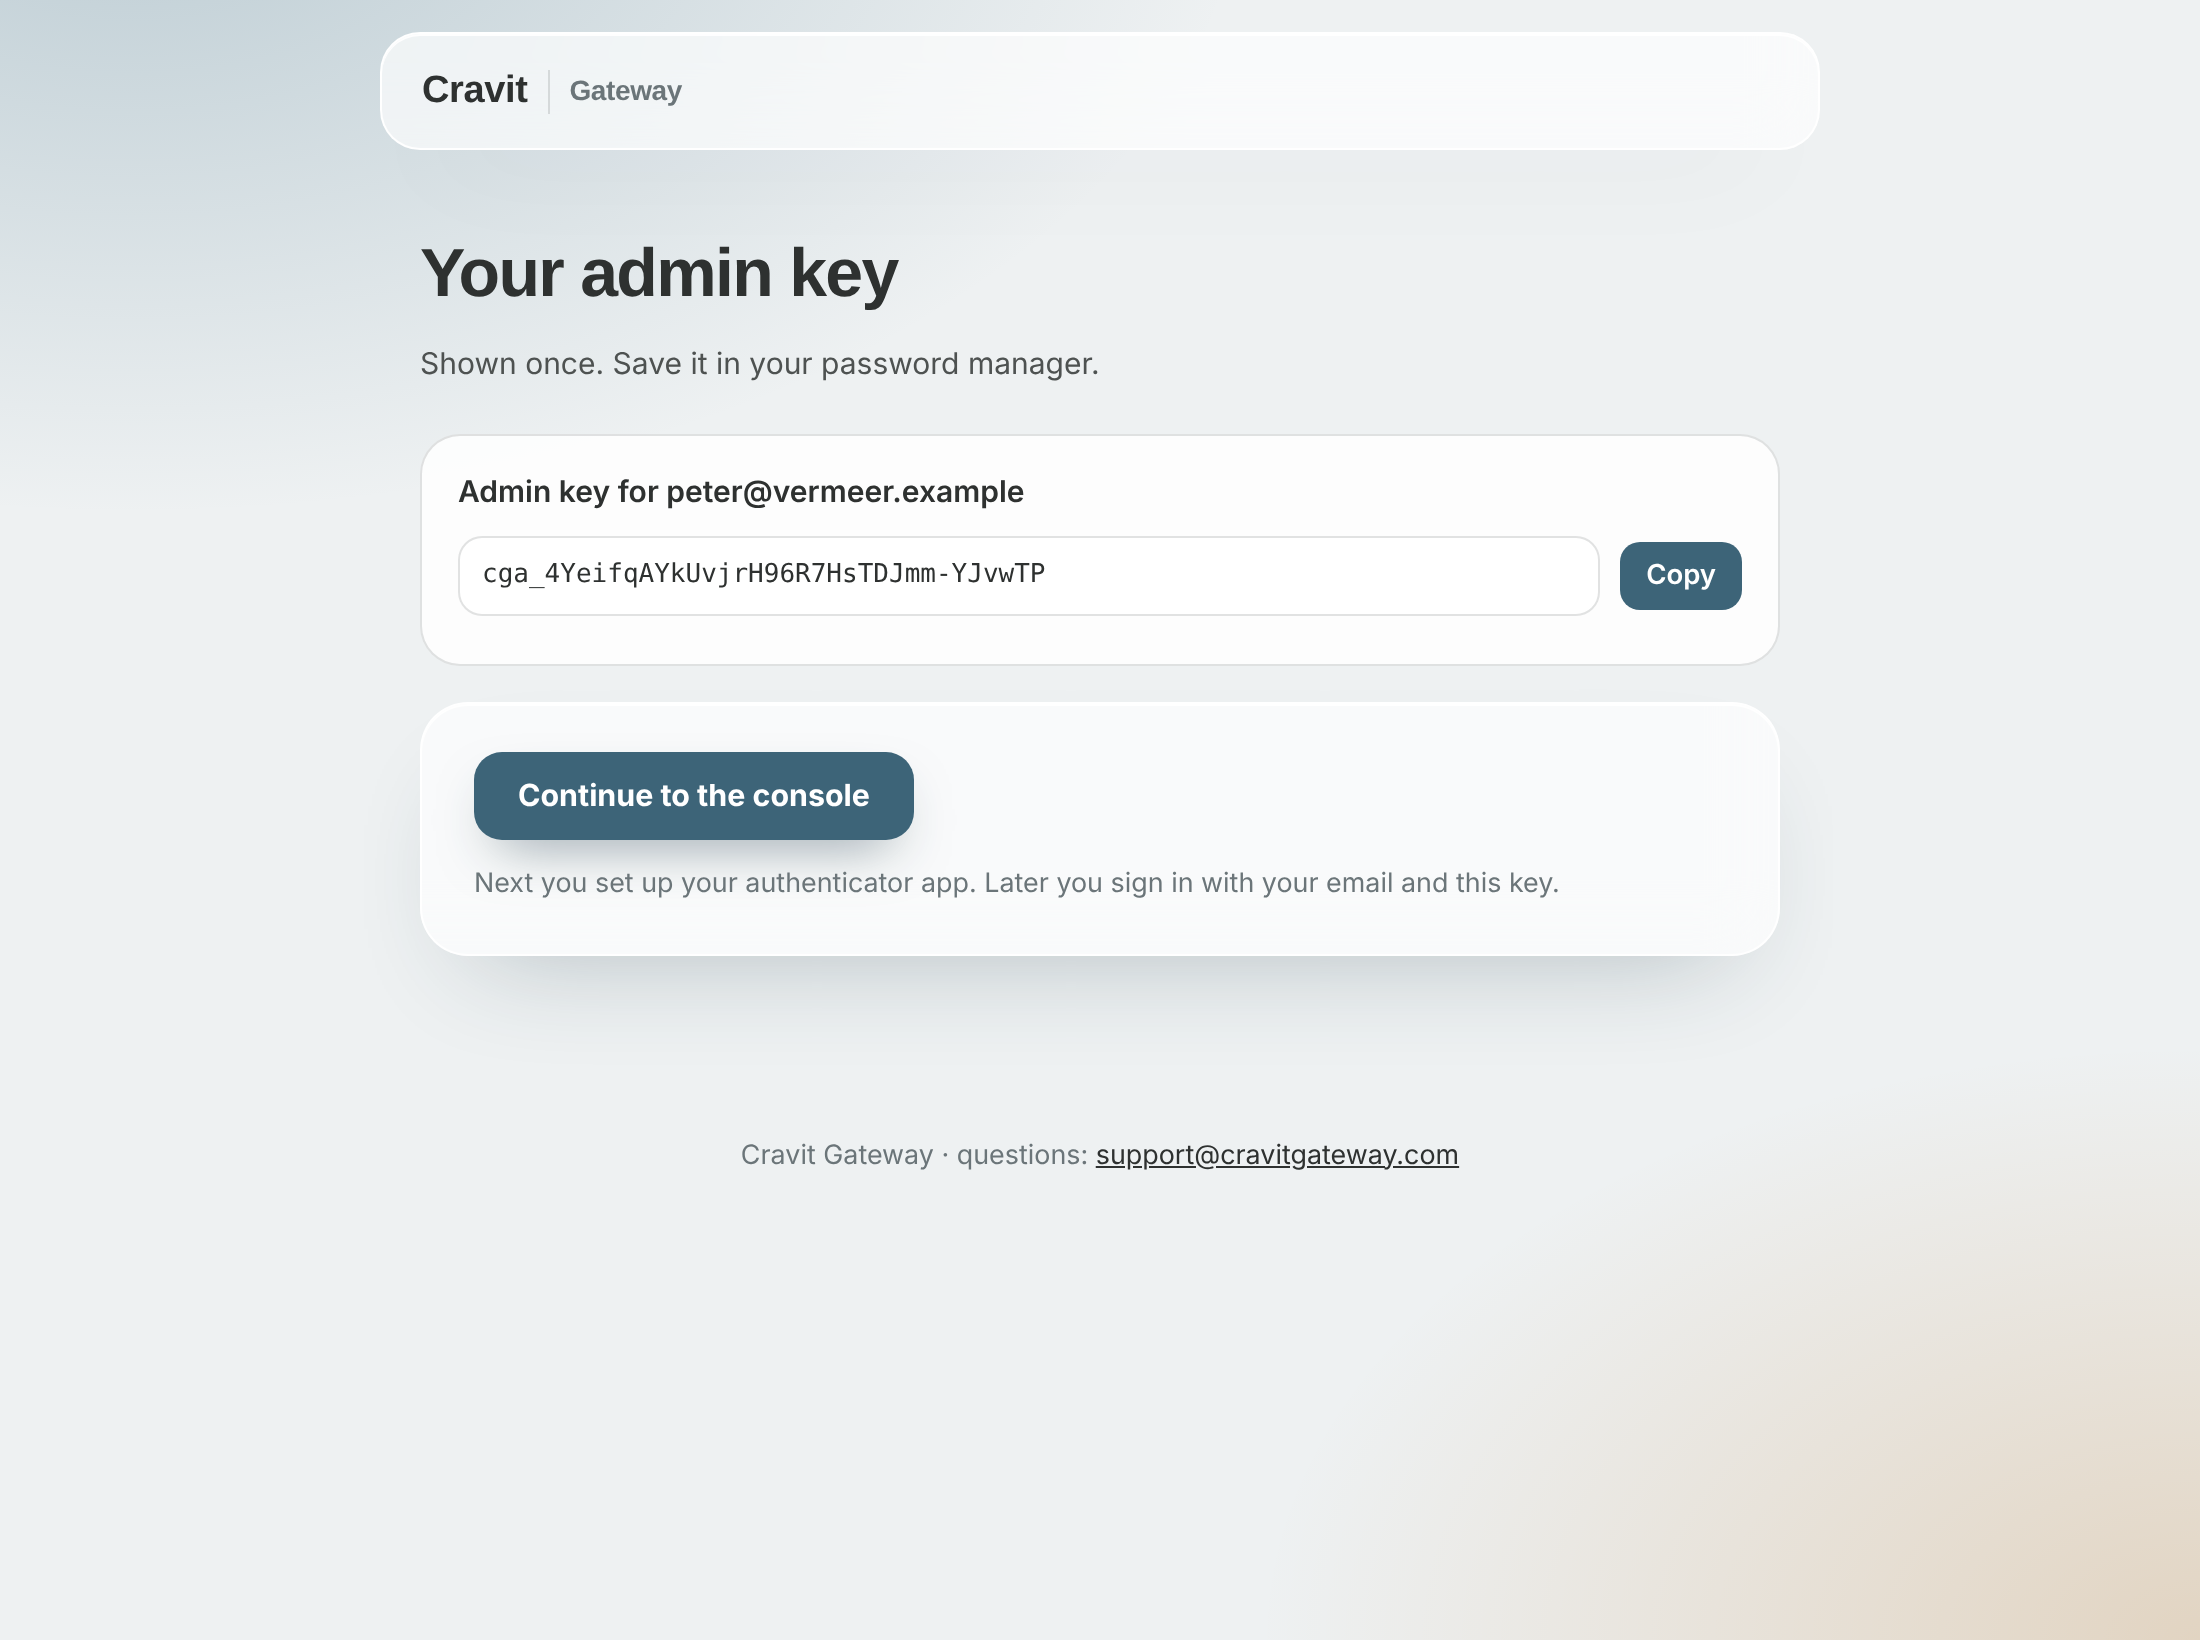
- Click Continue to the console. You are already signed in on this device; the console goes straight to the authenticator step below. Nothing to paste.
You then receive the one mail to keep, Your Cravit Gateway is ready, with your console address and the email you sign in with. Made an administrator by a colleague, or approved by Cravit by hand? Your mail has a personal link to the same page; it works once and expires after 7 days.
Later sign-ins: open your console address, enter your email and your cga_ key, then the 6-digit code from your authenticator app.
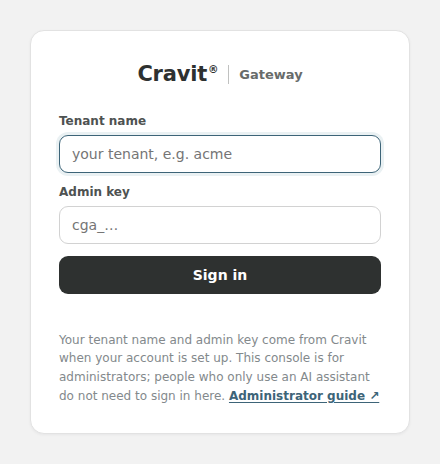
Click Lost your key? under the sign-in button and enter your email address. If it belongs to an administrator, you receive a link to create a new key; it works once, for one hour. Your authenticator app stays the same. Your current key keeps working until you use that link, so nobody can lock you out by typing your address. A link is sent every time you ask (at most one per ten minutes); an earlier link you never opened stops working, so use the most recent mail. Lost your authenticator too? Contact Cravit.
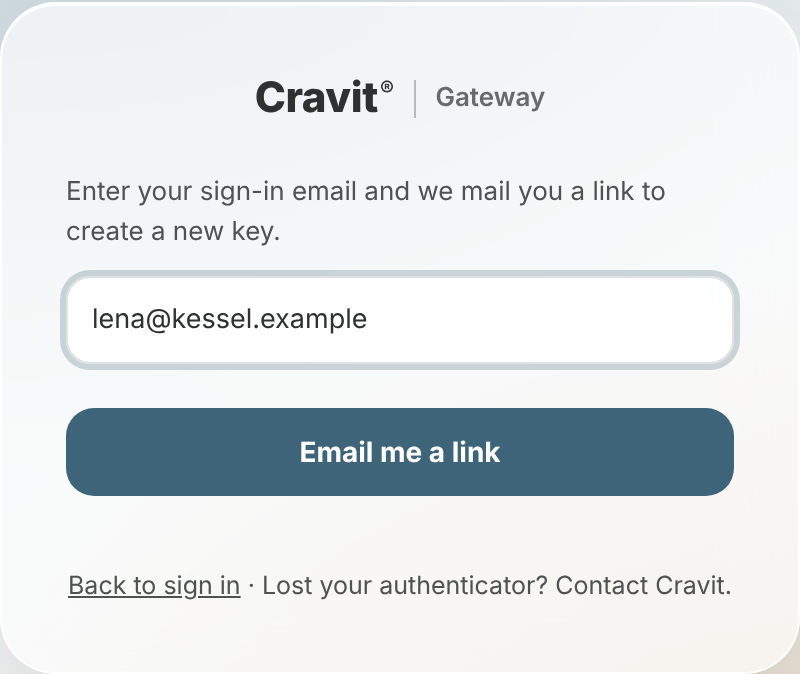
If the page says the link was already used and that was not you, contact Cravit immediately. You also receive a short email whenever your link is used, with the time and the address it came from.
The console has a light and a dark look. Switch with Light / Dark in the sidebar; the choice is remembered on this browser. The console opens in light.
2. Setting up two-factor authentication
Required for every administrator; it cannot be skipped.
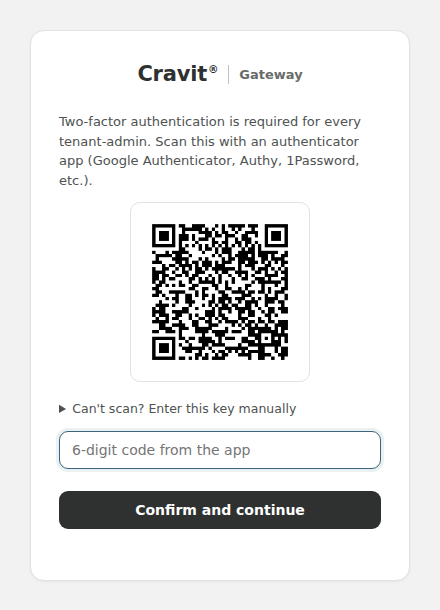
- Scan the QR code with an authenticator app (Google Authenticator, Microsoft Authenticator, Authy, 1Password). Can't scan? Enter the key manually.
- Type the 6-digit code it shows and click Confirm and continue.
Contact Cravit and we reset your two-factor setup so you can enrol again.
3. Setting up your gateway
On first sign-in the console shows only three steps in the sidebar until you are done (or click Skip to Home).
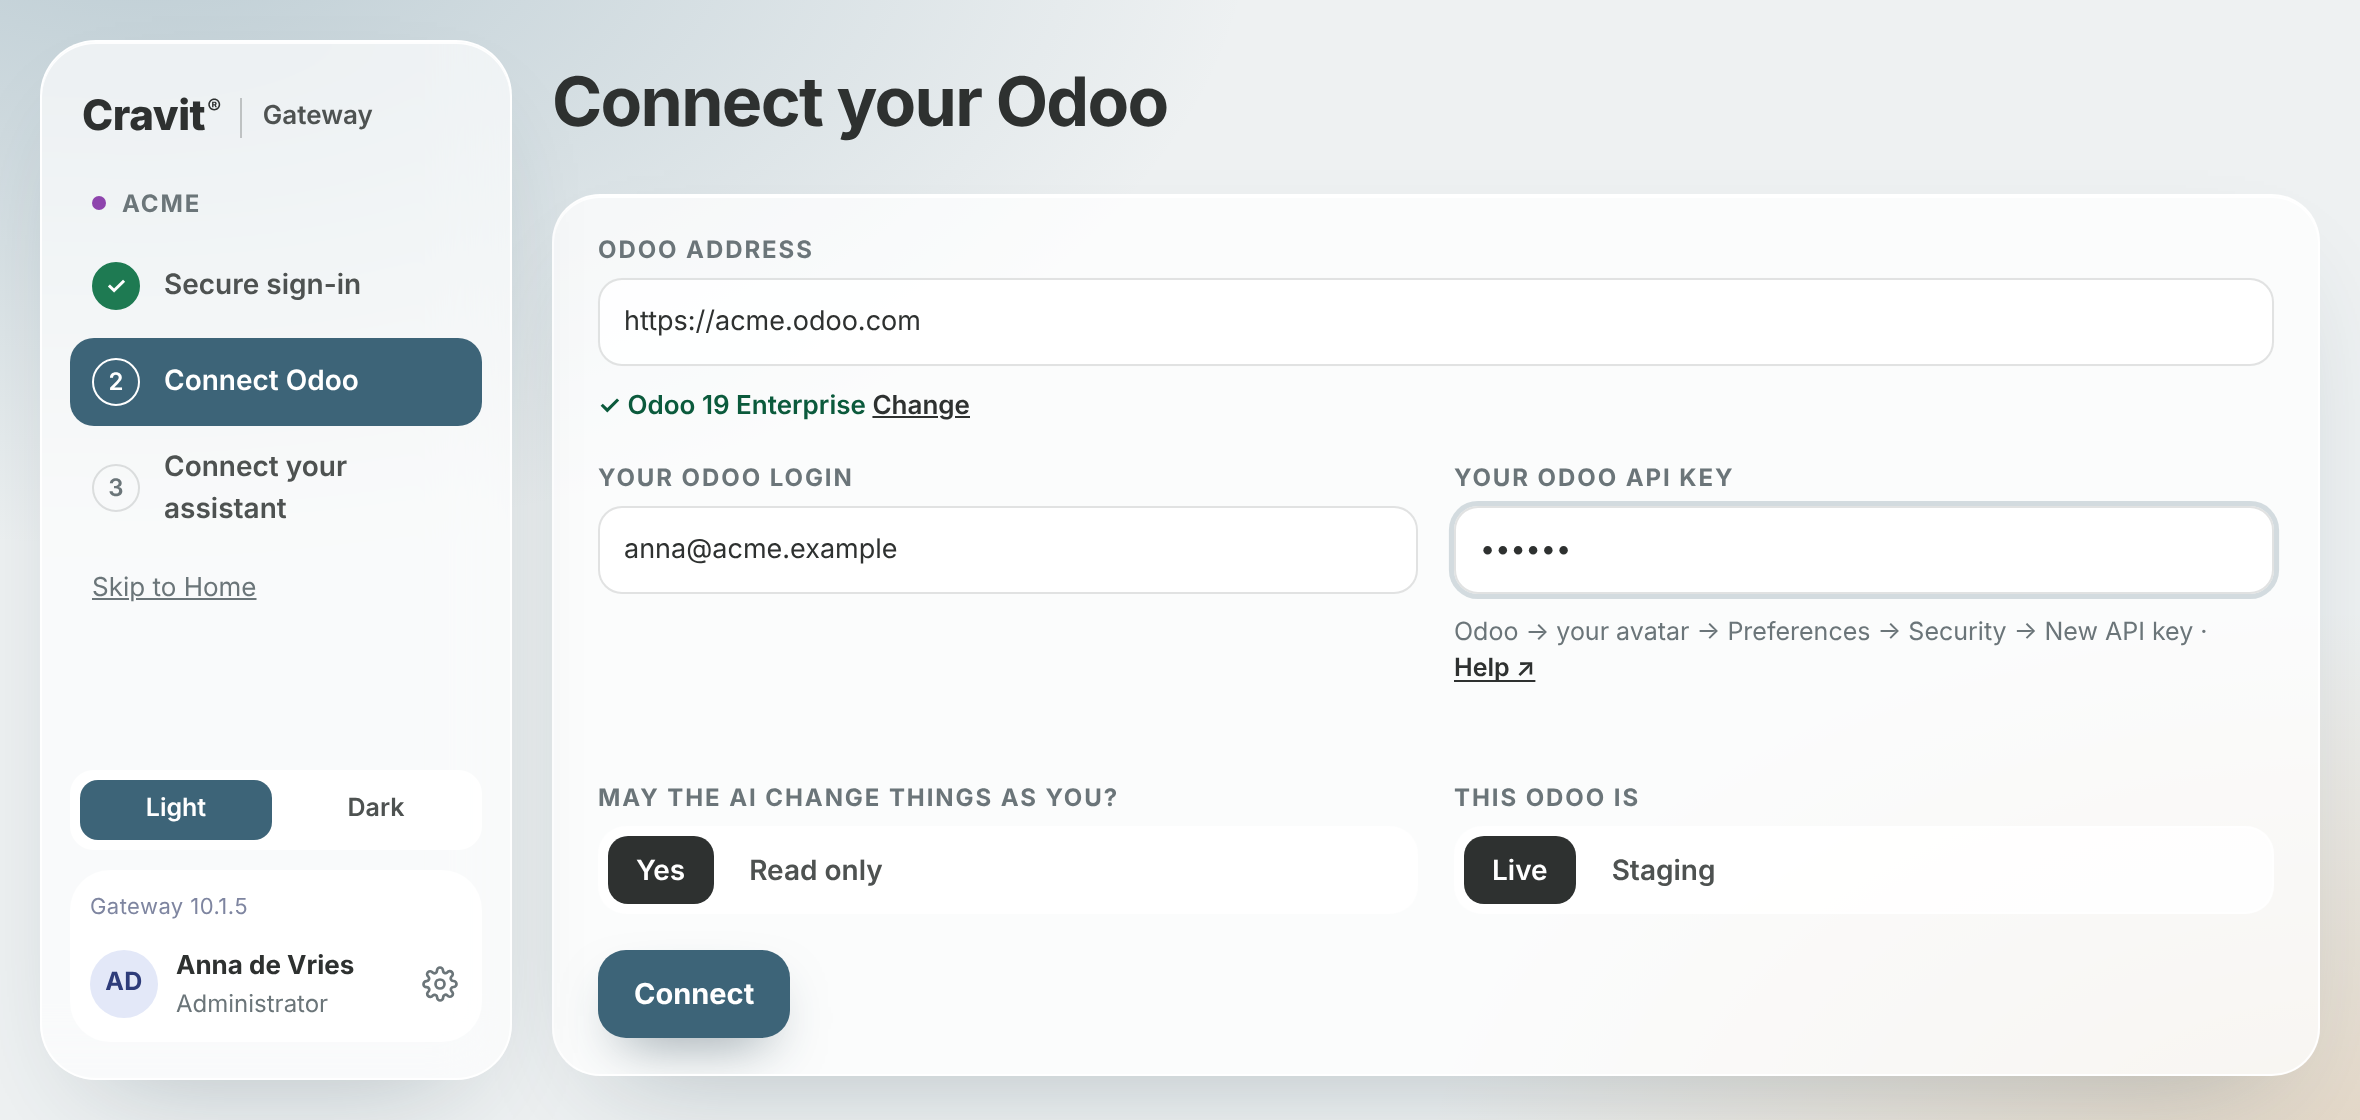
- Connect your Odoo — one form. Paste the address you open Odoo with (for example
https://yourcompany.odoo.com); the version and database appear under it (Change if not right). Your Odoo login is filled in; paste an Odoo API key, choose Yes or Read only and Live or Staging, and click Connect. The gateway checks the address, the database and your key in one go. - Connect your assistant — one card per assistant. Click Copy address, add it in your assistant (three steps on the card, Guide for screenshots), and press Authorize on the page that opens. On the same browser within 30 minutes you are recognised: no key to paste.
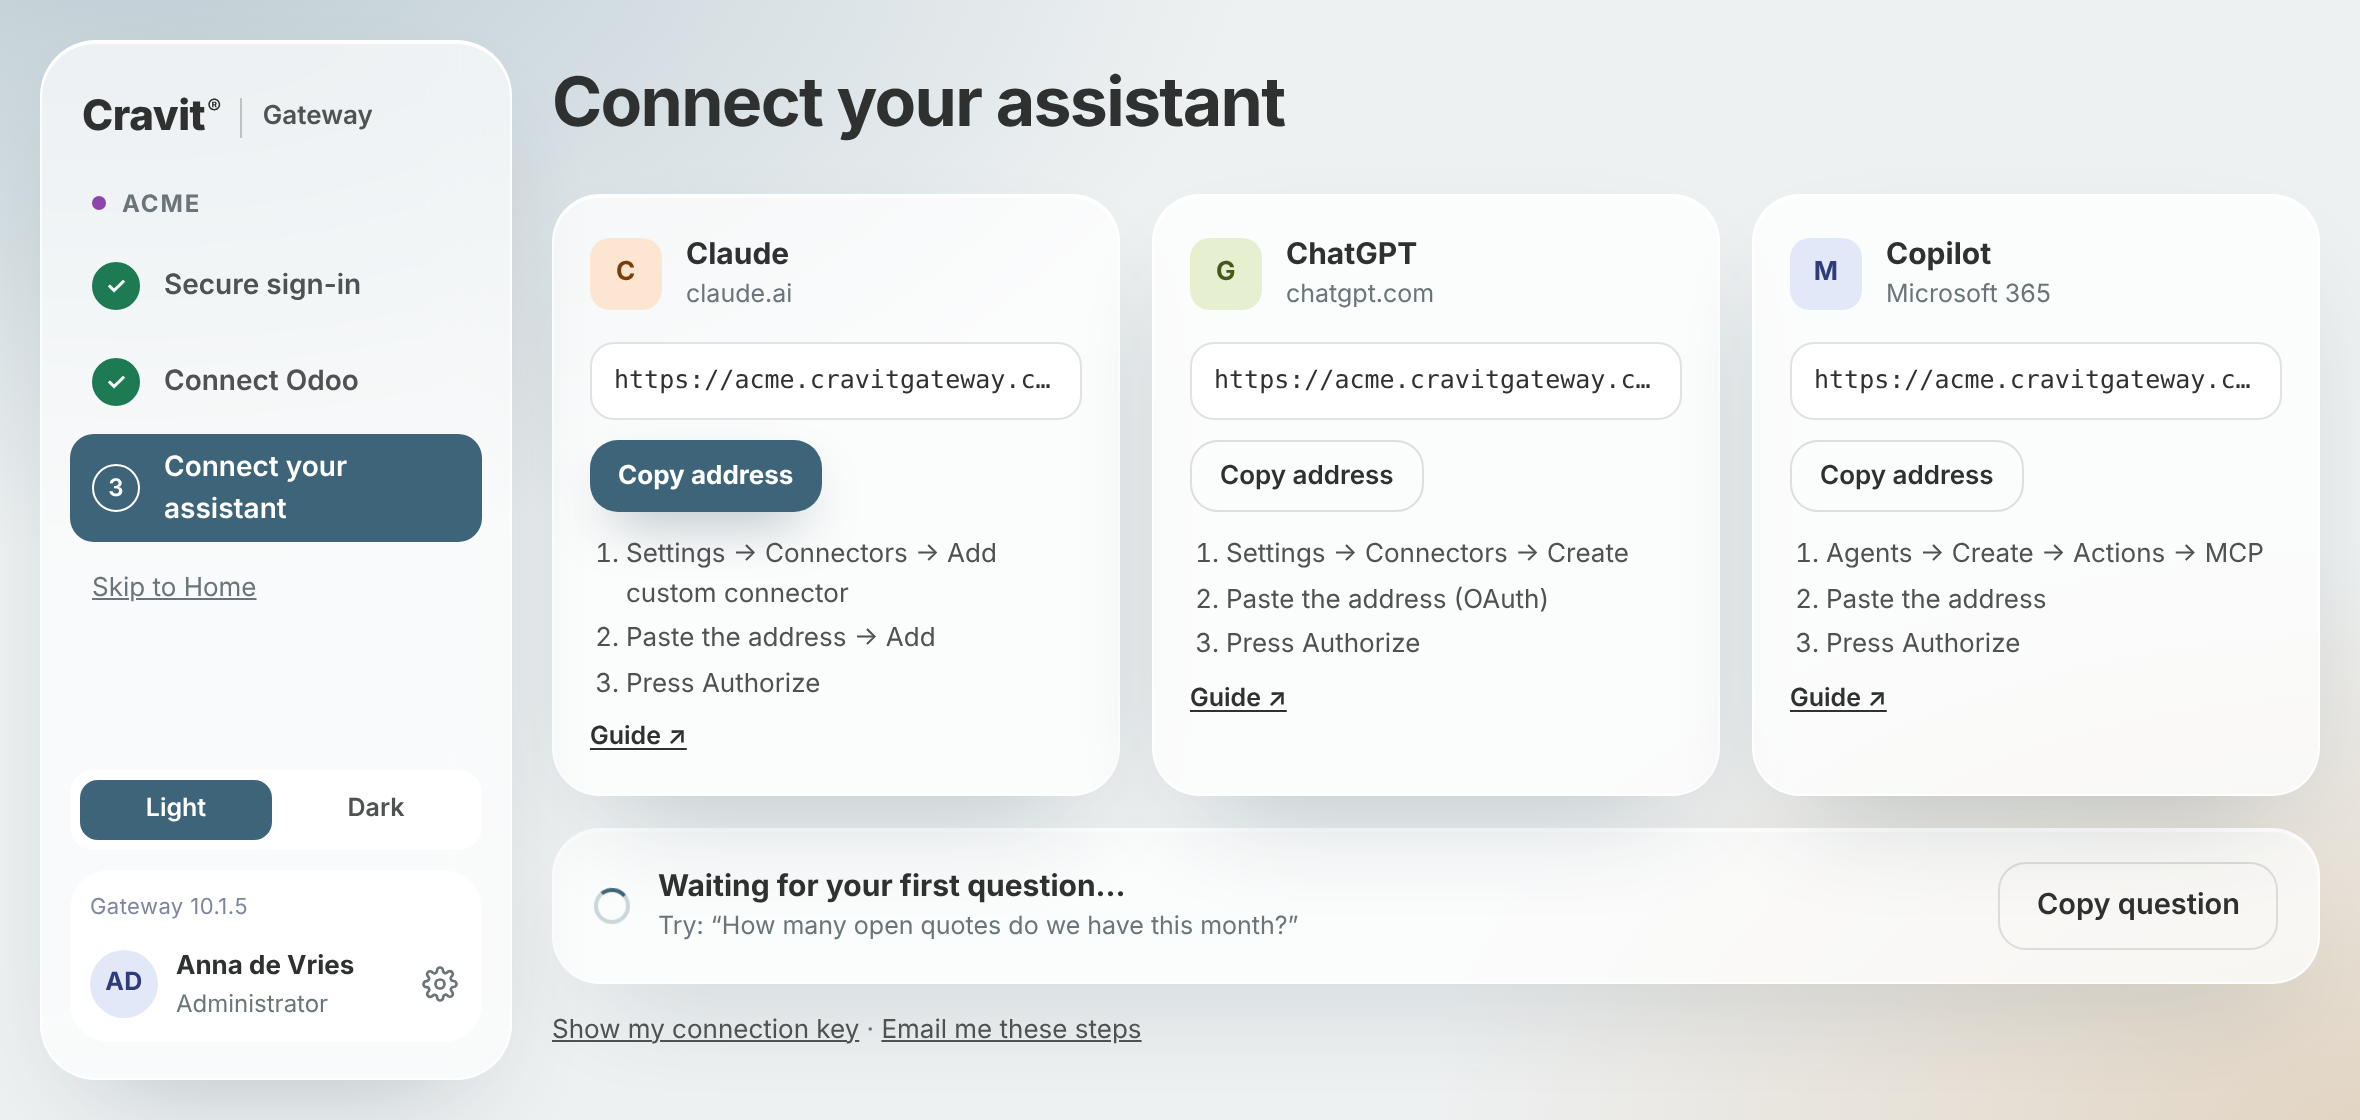
- Ask the suggested first question. The page turns green with Connected as soon as the answer comes through.
- Show my connection key is for another browser or device (shown only on this page). Email me these steps sends the address and steps, never the key.
On Odoo 19 and later you don't need the database name. For older versions, if it is not detected: Odoo Online uses the first part of your address; on Odoo.sh it is the name shown on the production branch; on your own server, ask whoever runs it. Changing the address later (under Settings) always asks for a fresh authenticator code.
4. Finding your way around
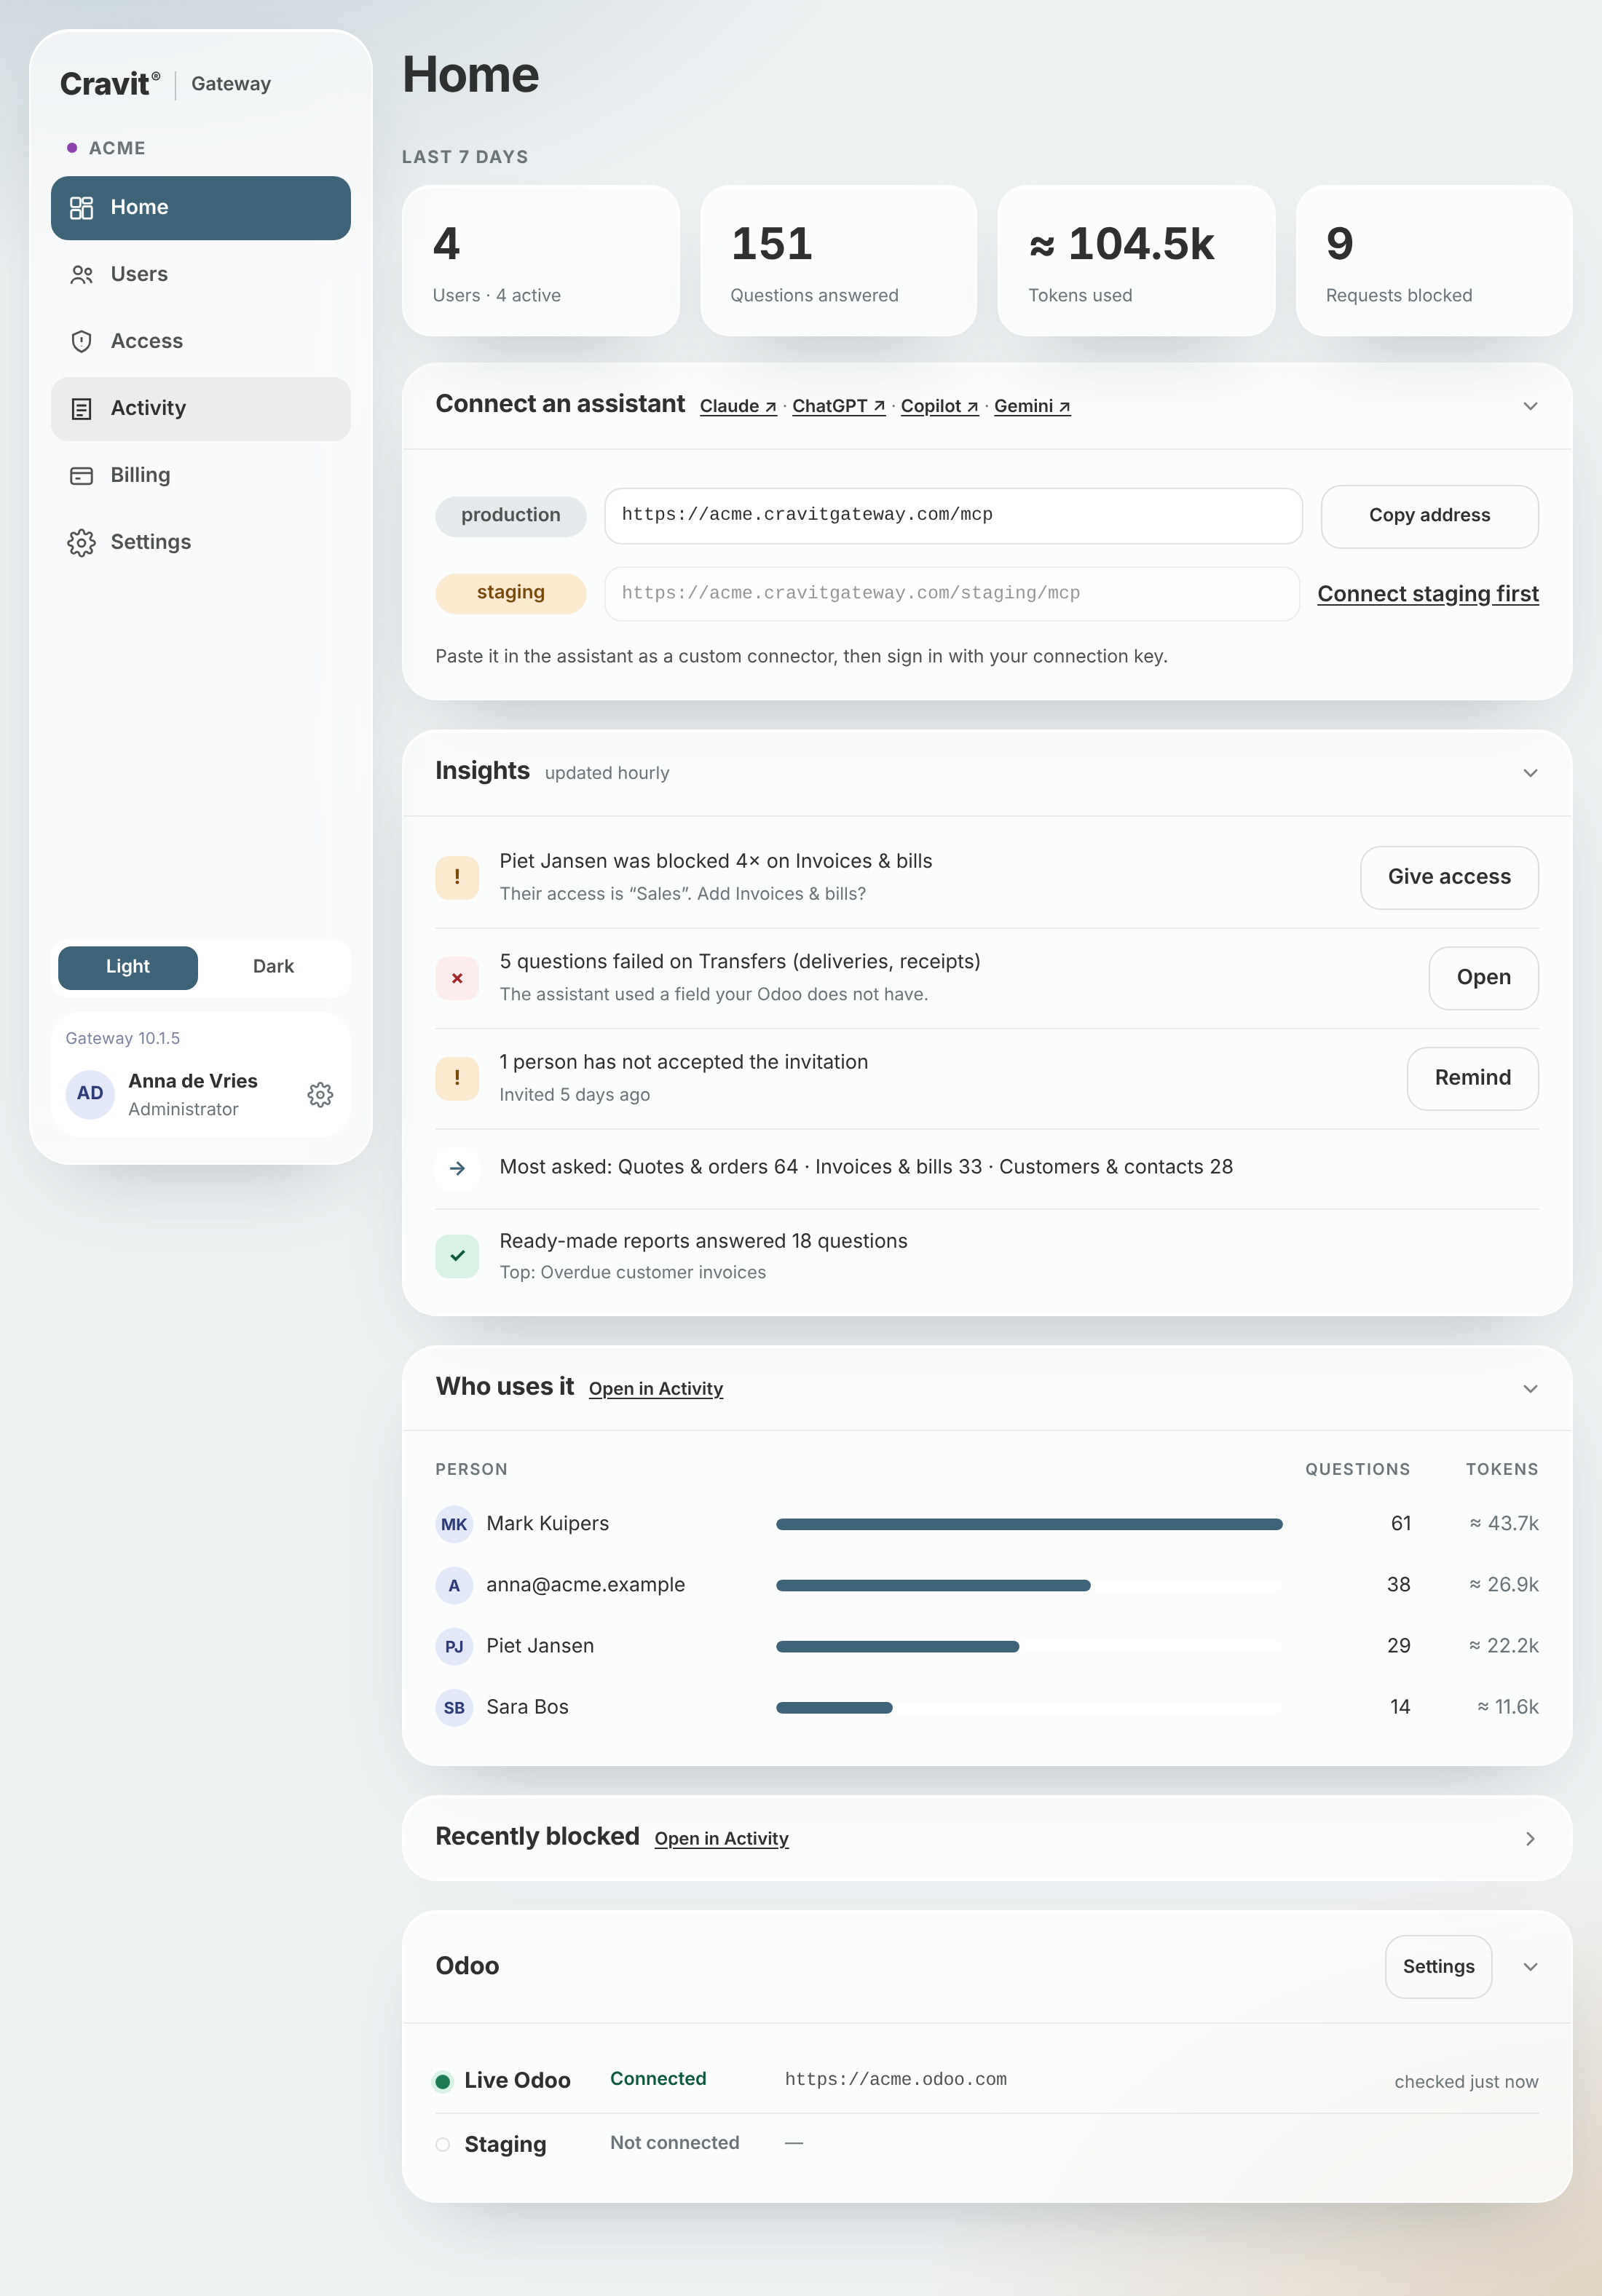
- Home: the last seven days, Insights with one-click fixes (give access, remind, send a new-key link), Who uses it, your assistant address (Connect an assistant), and whether your Odoo is connected.
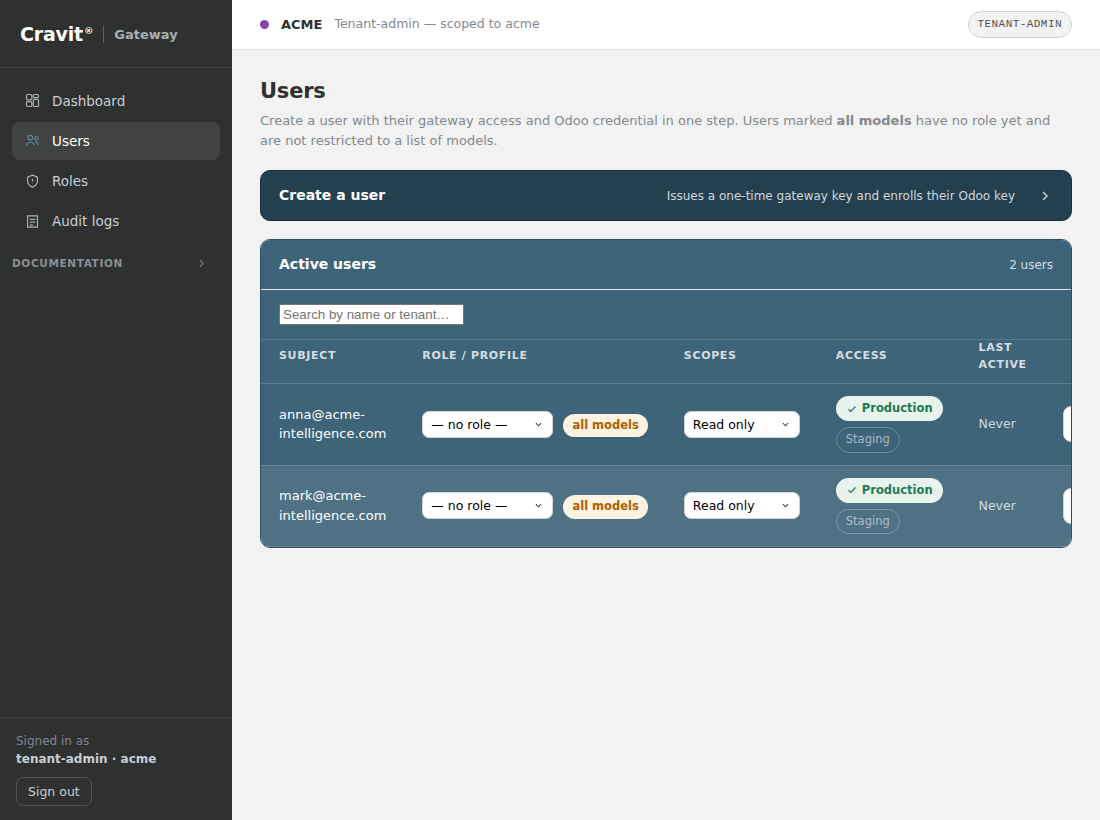
- Users: who may use the AI, what each person may see and change.
- Access: the areas of Odoo the AI may see for a person (Sales, Finance, …).
- Activity: every question and every refusal, permanently.
- Billing: your plan, invoices and billing details.
- Settings: your Odoo connection, a staging copy, who may open this console, a company-wide instruction for the AI.
Any section can be folded with the arrow on its right; the console remembers it.
5. Giving someone access
On Users, click Add a colleague (top right). Type emails (one or several), or Pick from Odoo and tick your colleagues. Choose what the AI may see and whether it may make changes, then Send. People already connected or invited are greyed out. The tabs above the list (All · Can change · Read only · Admins · Invited · Inactive) show how many people are in each.
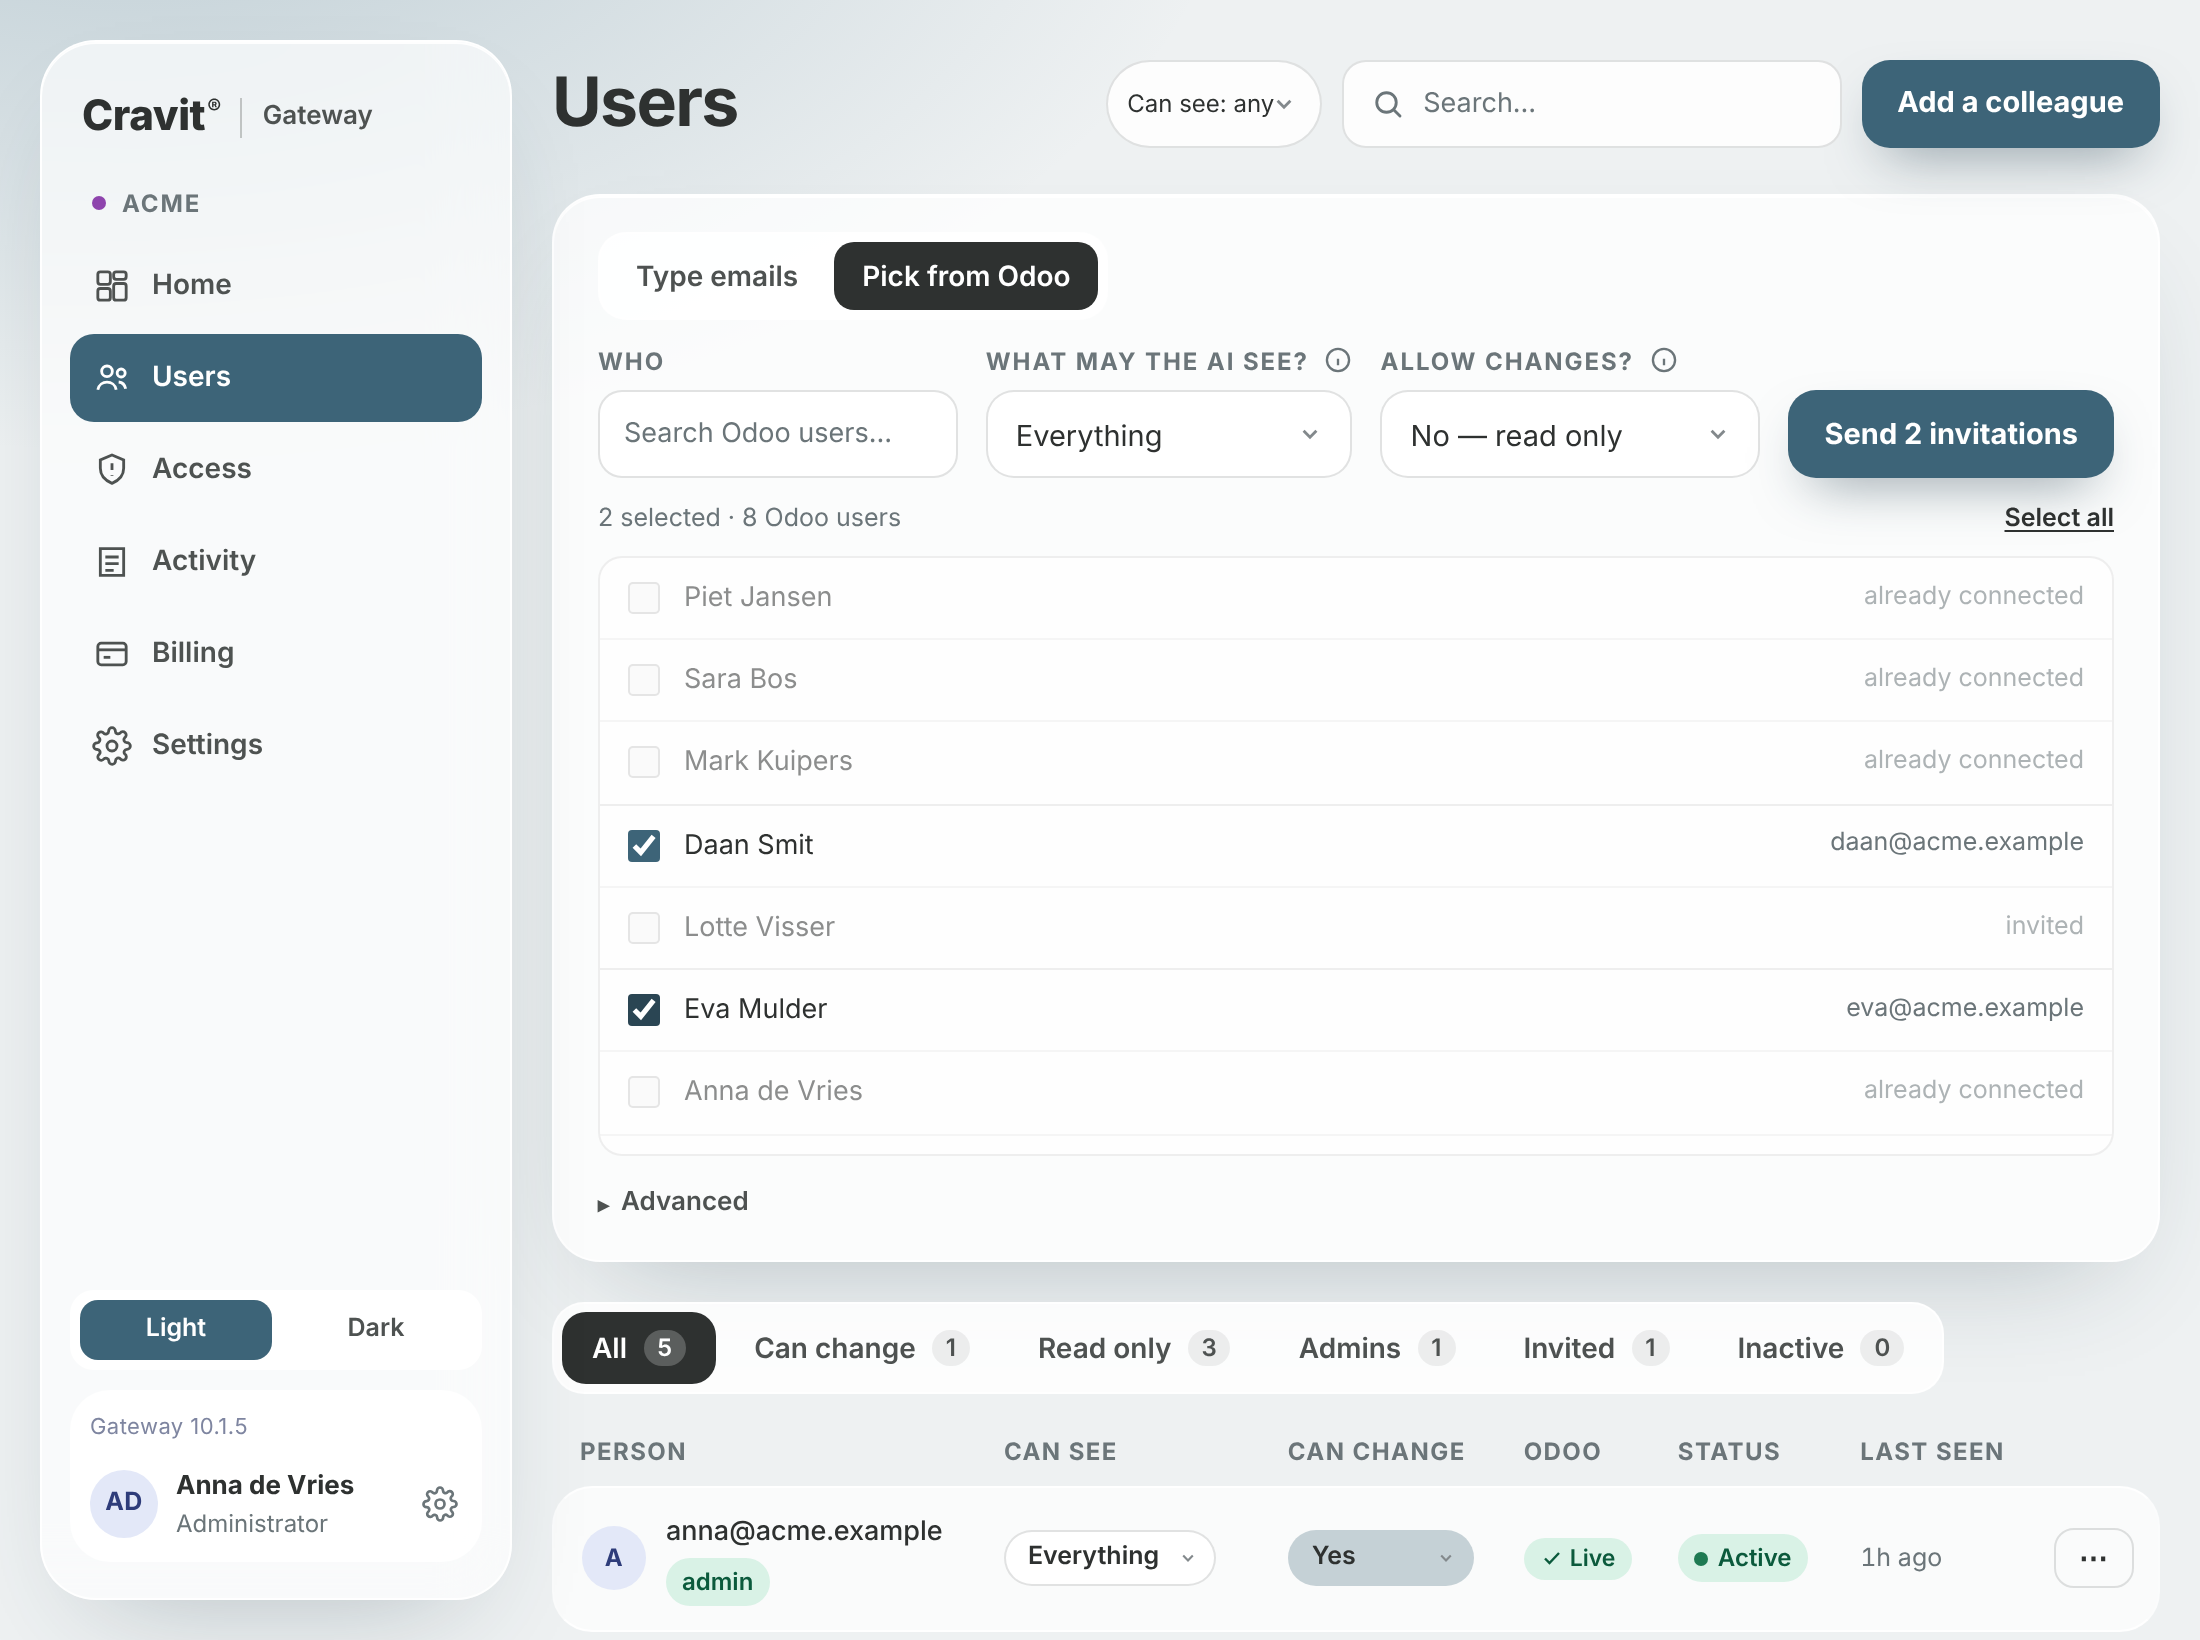
- What may the AI see? An area of Odoo — Sales, Finance, Purchasing, Inventory, Projects, HR, Contacts — or Everything. Within an area the person's own Odoo rights still apply; the AI never sees more than they could.
- Allow changes? No — read only. Yes: it may also create and update records as that person, and asks before changing more than one record at a time.
Your colleague gets a mail with one button. The page asks for one thing, their own Odoo API key, and then shows their connection key. They open their AI assistant, connect Cravit Gateway under Connectors and paste the key when it asks. You never handle their Odoo key, and no key travels by email.
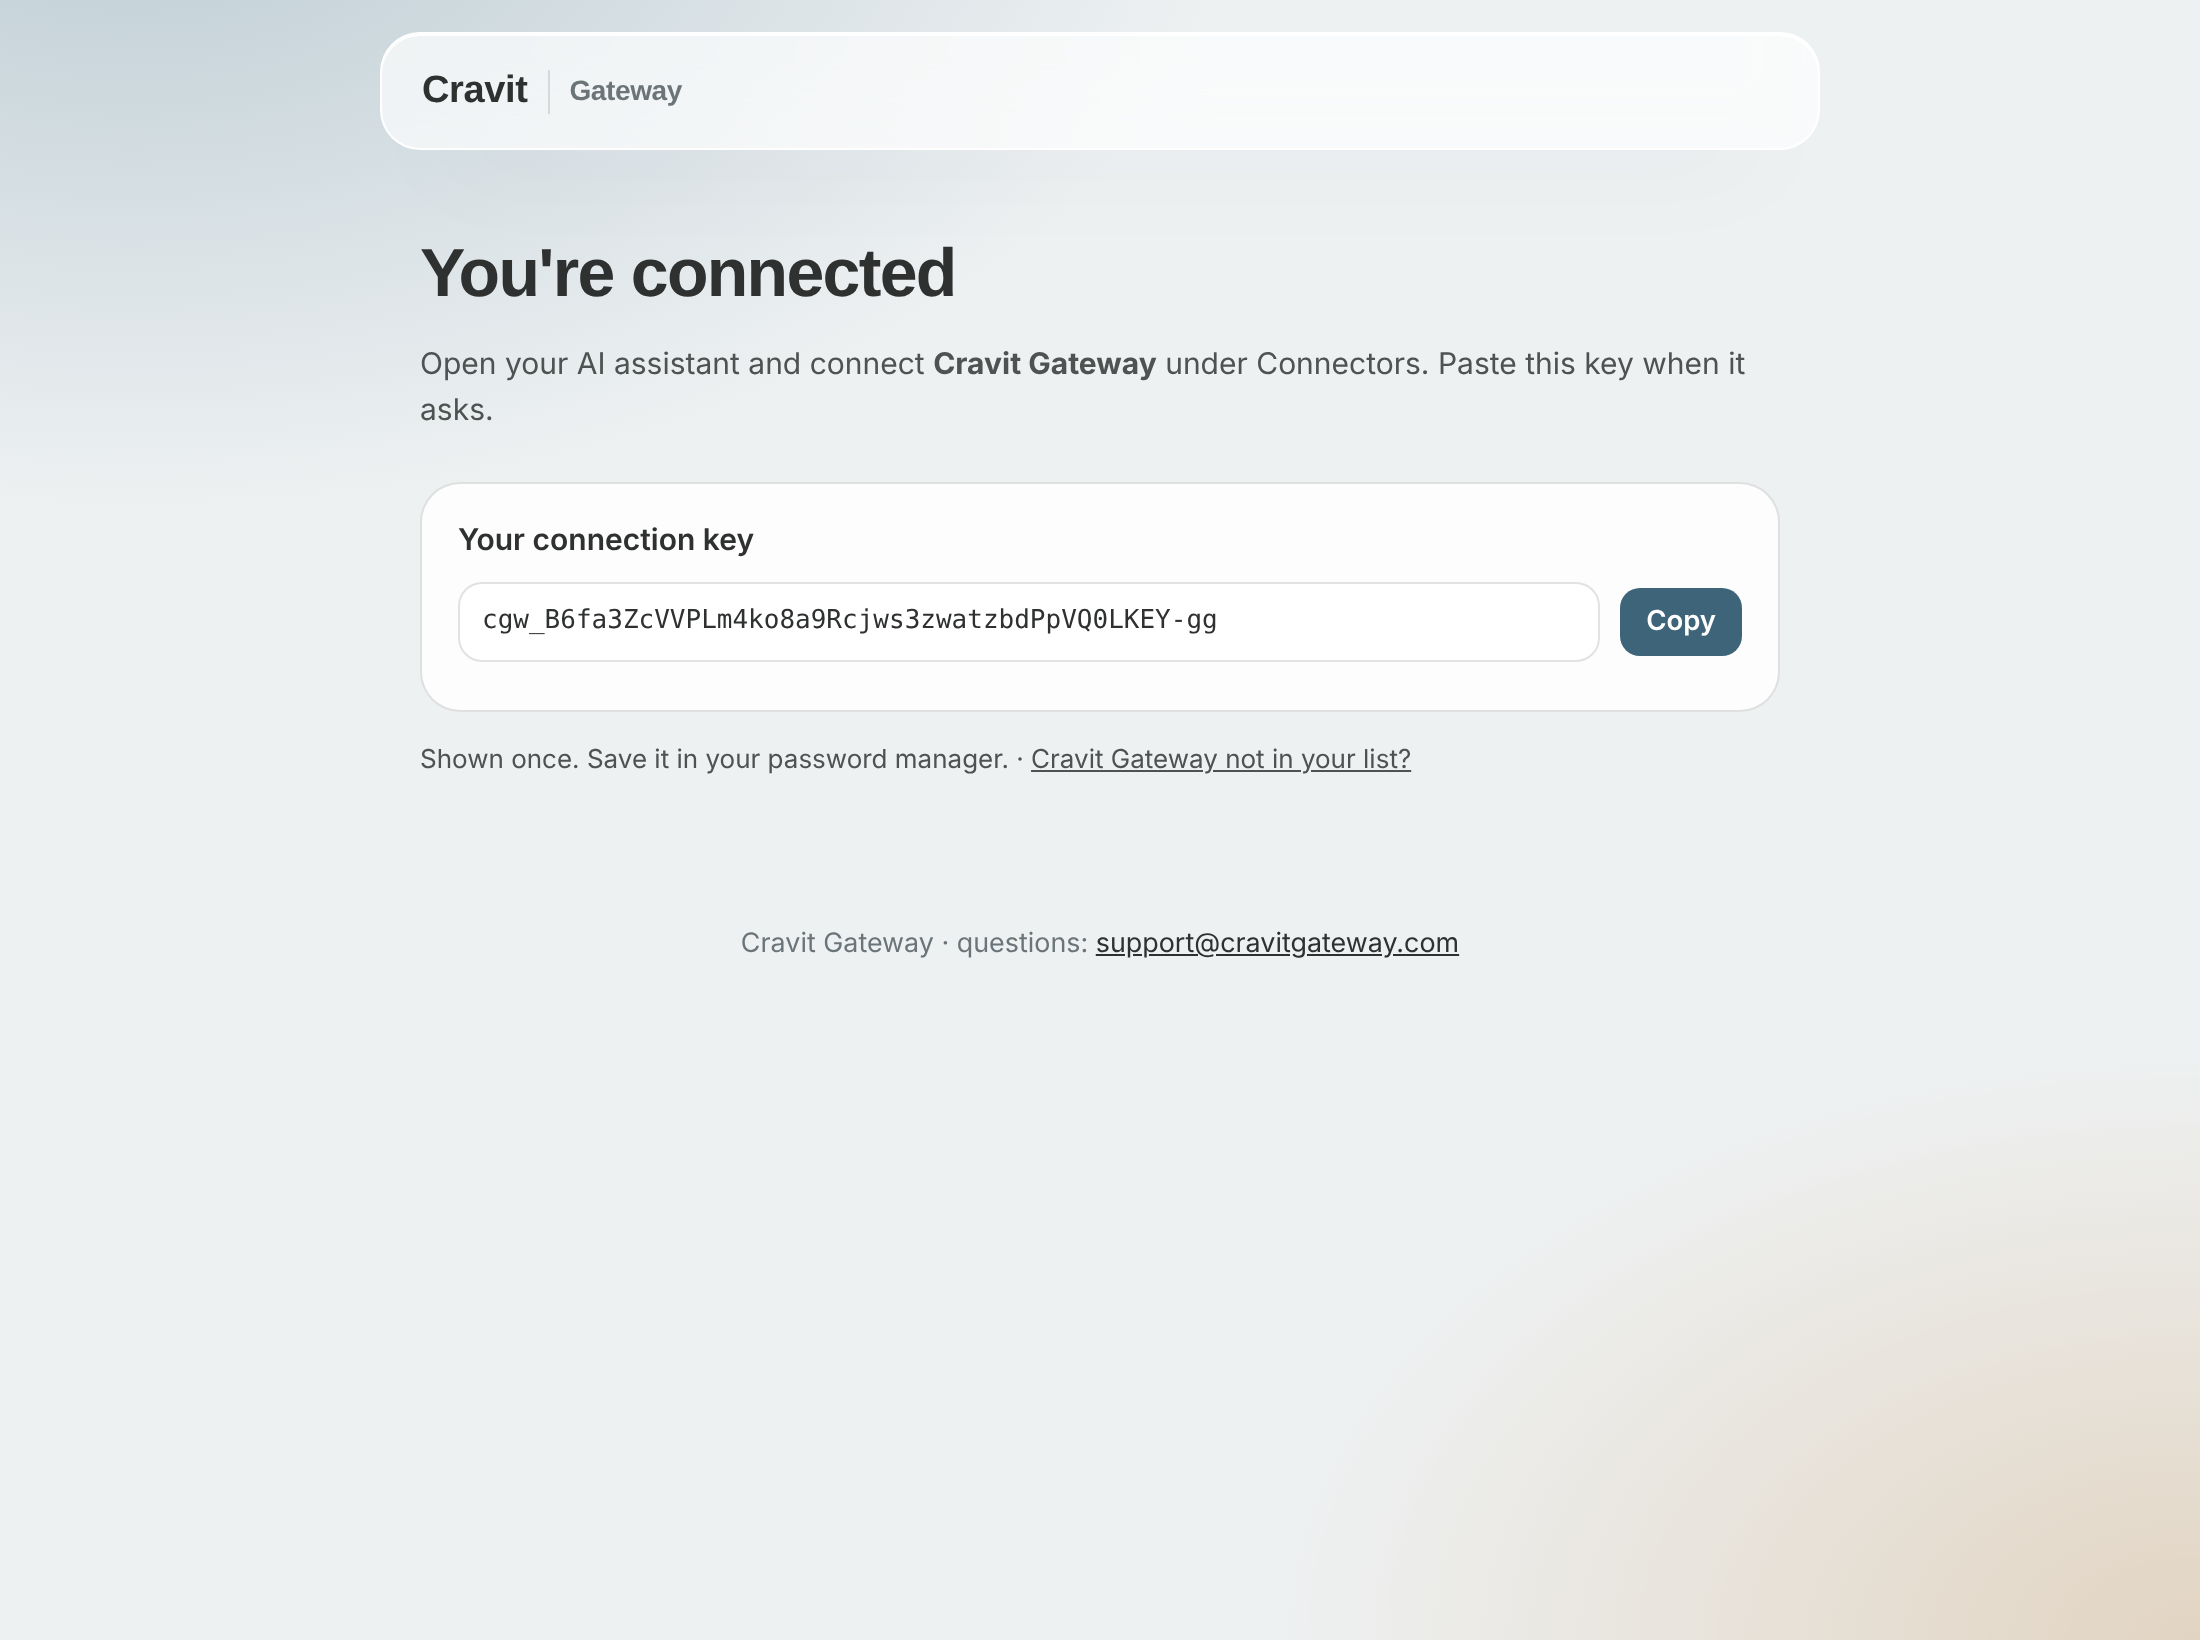
Adding the connector to the assistant is your job as administrator (step 3 of Set up); on a Claude Team or Enterprise plan you add it once for everyone. A colleague who has to add it themselves, for example on a personal plan, clicks Cravit Gateway not in your list? on that page for the address and the steps.
- A link is personal, works once and expires after seven days. Until it is opened, the person shows in the list with status Invited; the ⋯ menu on that row sends it again or withdraws it.
- Later, a person's Actions menu lets you ask them for a new Odoo key, give them a new connection key, add or remove live or staging access separately, add a personal instruction for the AI, or stop their access altogether (reversible).
- Remove live Odoo access / Remove staging access take one connection away and keep the person in the list with their roles and history; with neither connection left they show as No access. Add it back from the same menu — they get a new connection key. A revoked key stops working within a minute, also for an assistant that is already connected.
- Email not arriving? Check spam, then Resend. If sending fails, the console shows you the link to pass on yourself.
Advanced: staging, or entering their key yourself
Click Add a colleague, then open Advanced.
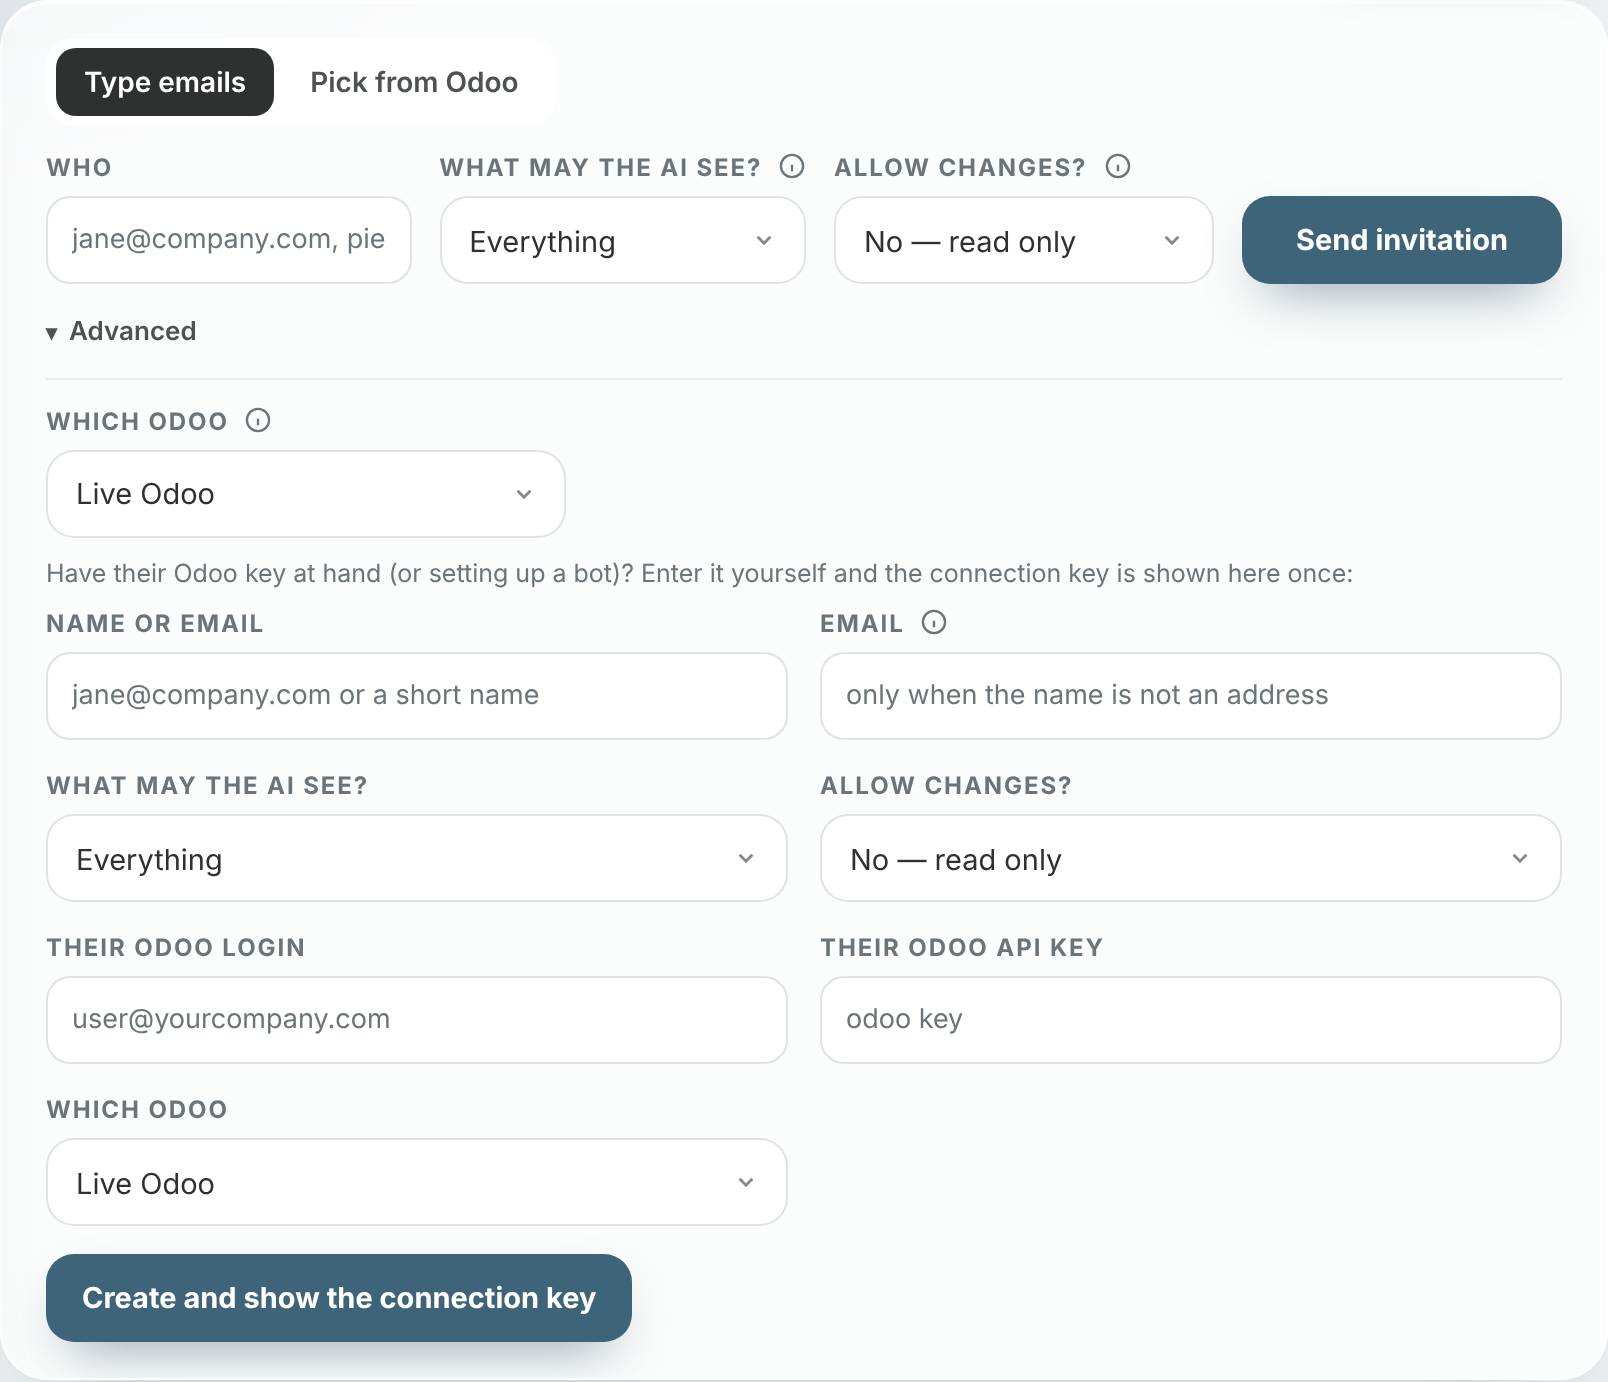
- Which Odoo: the invitation is for your live Odoo or the staging. The other can be added later from the person's Actions menu.
- Have their Odoo API key at hand, or setting up a bot with no inbox? Fill in the form and the connection key is shown to you once, with Copy connection instructions for a ready-made message.
If it is lost, choose New connection key in the person's Actions menu. Their Odoo key stays as it is.
More than one administrator
Open a user's Actions menu and choose Make administrator. They get a personal one-time link by email; opening it creates their own admin key (shown to them once), and they set up their own authenticator. The key is never in the email. Their AI access does not change.
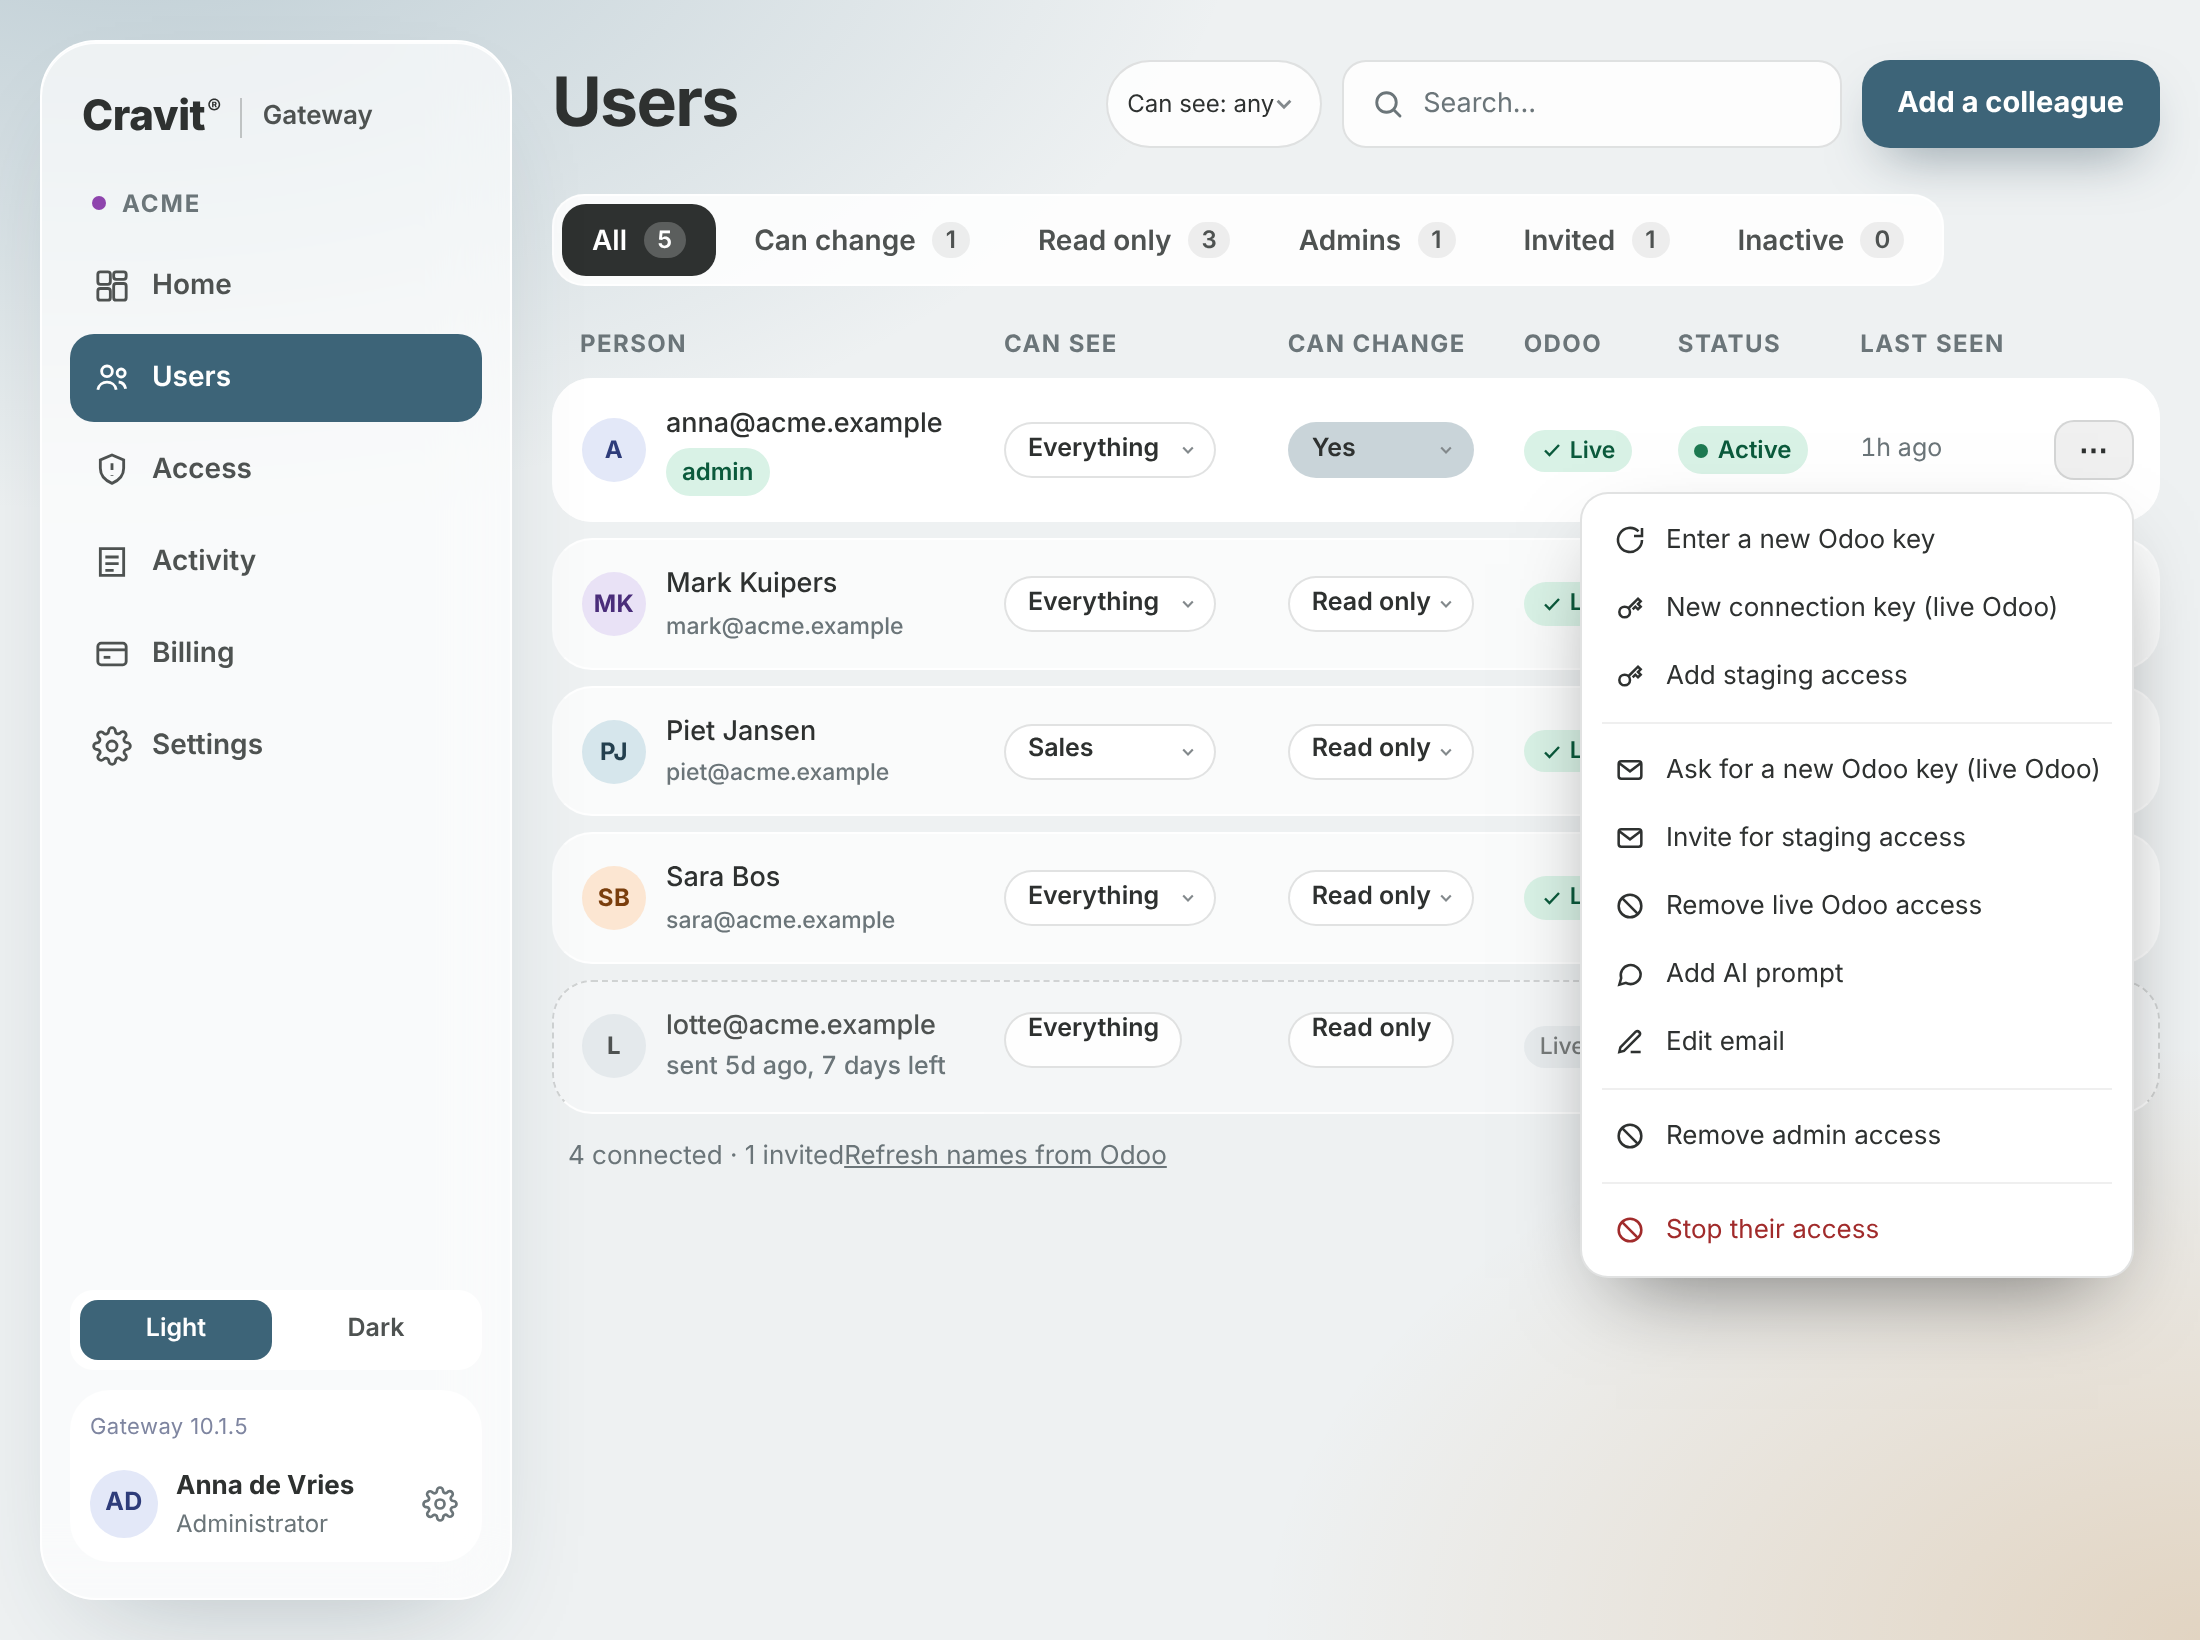
Remove admin access is in the same menu. You cannot remove yourself, and the last administrator cannot be removed. A person can administer one gateway only.
Generating an Odoo API key
Each user makes their own, in about a minute:
- In Odoo, click your avatar → My Profile (or Preferences).
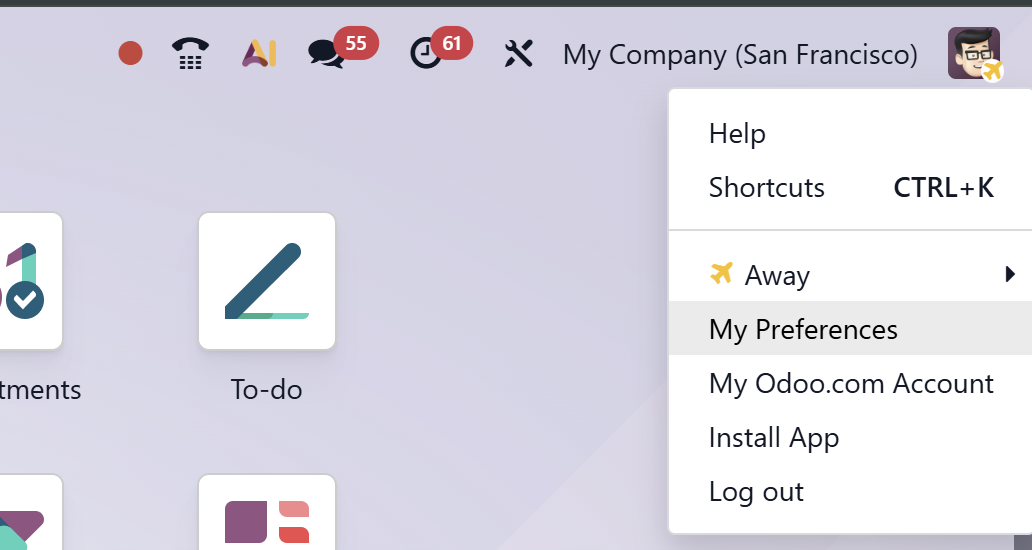
- Open the Security tab → Add API Key, confirm your password.
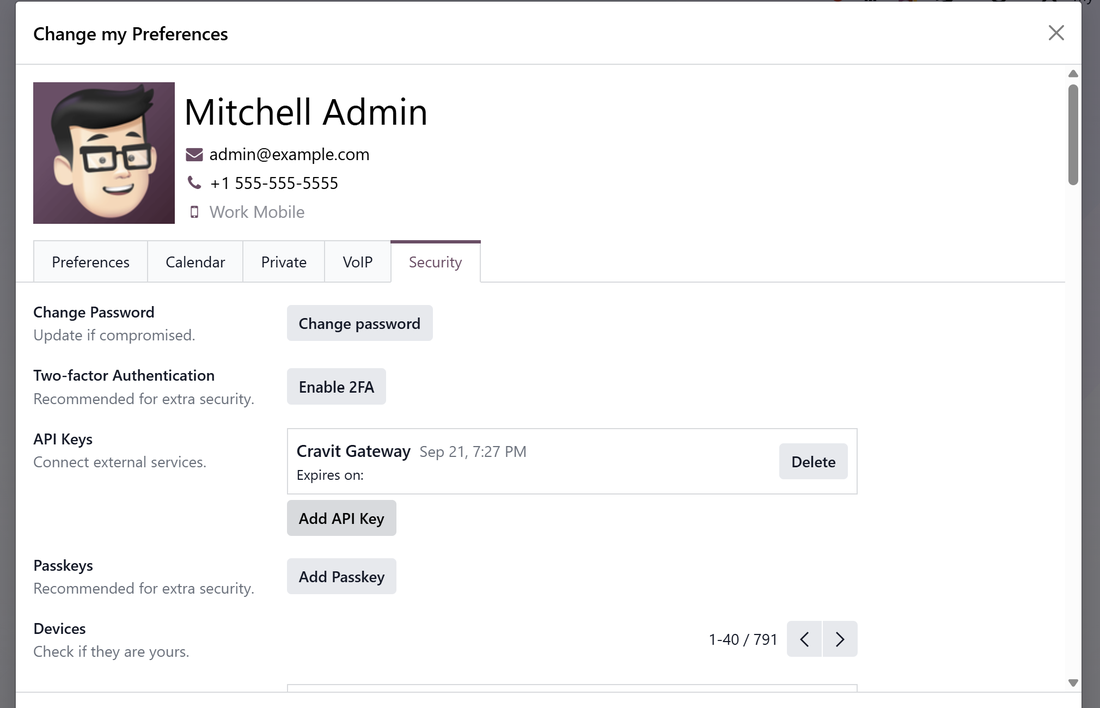
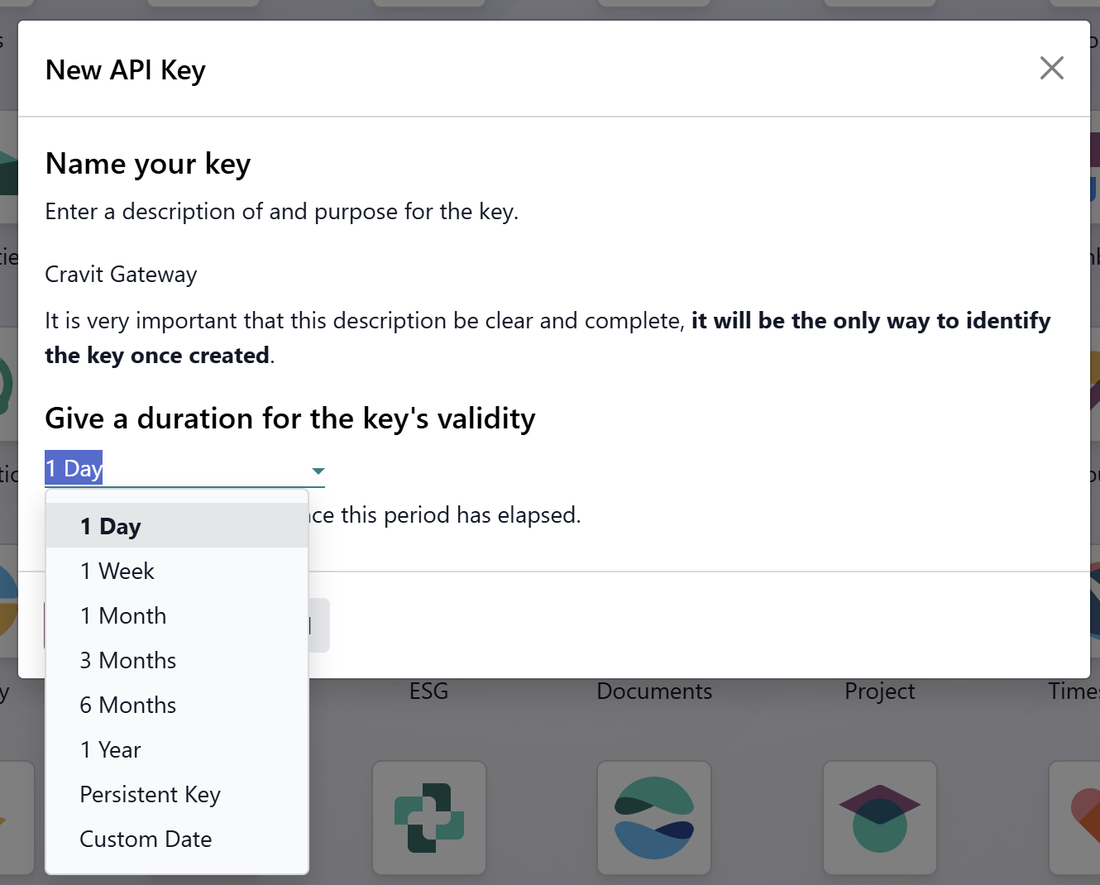
- Description: "Cravit Gateway". Duration: see the warning below.
- Generate Key and copy it at once. Odoo shows it only once.
The duration defaults to 1 Day. Choose Persistent Key (or 1 Year). Duration cannot be changed afterwards; delete and generate a new key if it is too short.
No Security tab or Add API Key? On hosted Odoo plans, API keys may need a higher-tier plan.
Staging (optional)
You can connect a staging copy of Odoo (an Odoo.sh staging branch or a duplicate) next to your live one. A person gets a separate connection key for it, which only works on the staging address (ending in /staging/mcp).
- Connect it under Settings → Staging: address, database, version, Test connection, save with an authenticator code.
- Starting with staging is fine: connect only that on the Set up page, give people staging access, and connect your live Odoo under Settings whenever you are ready — then add live access per person.
- Invite people for staging (Advanced → Which Odoo), or use Add staging access in their Actions menu. They add it as a separate connector in their assistant.
- The same area, change permission and confirmations apply on both. Remove staging access or Remove live Odoo access takes one away; Stop their access switches off both.
- After an Odoo.sh rebuild: update the database name under Settings → Staging, and send people Ask for a new Odoo key (staging).
6. Controlling what the AI can see
Access lists the areas of Odoo. Pick one for a person on the Users page; that is all most companies need.
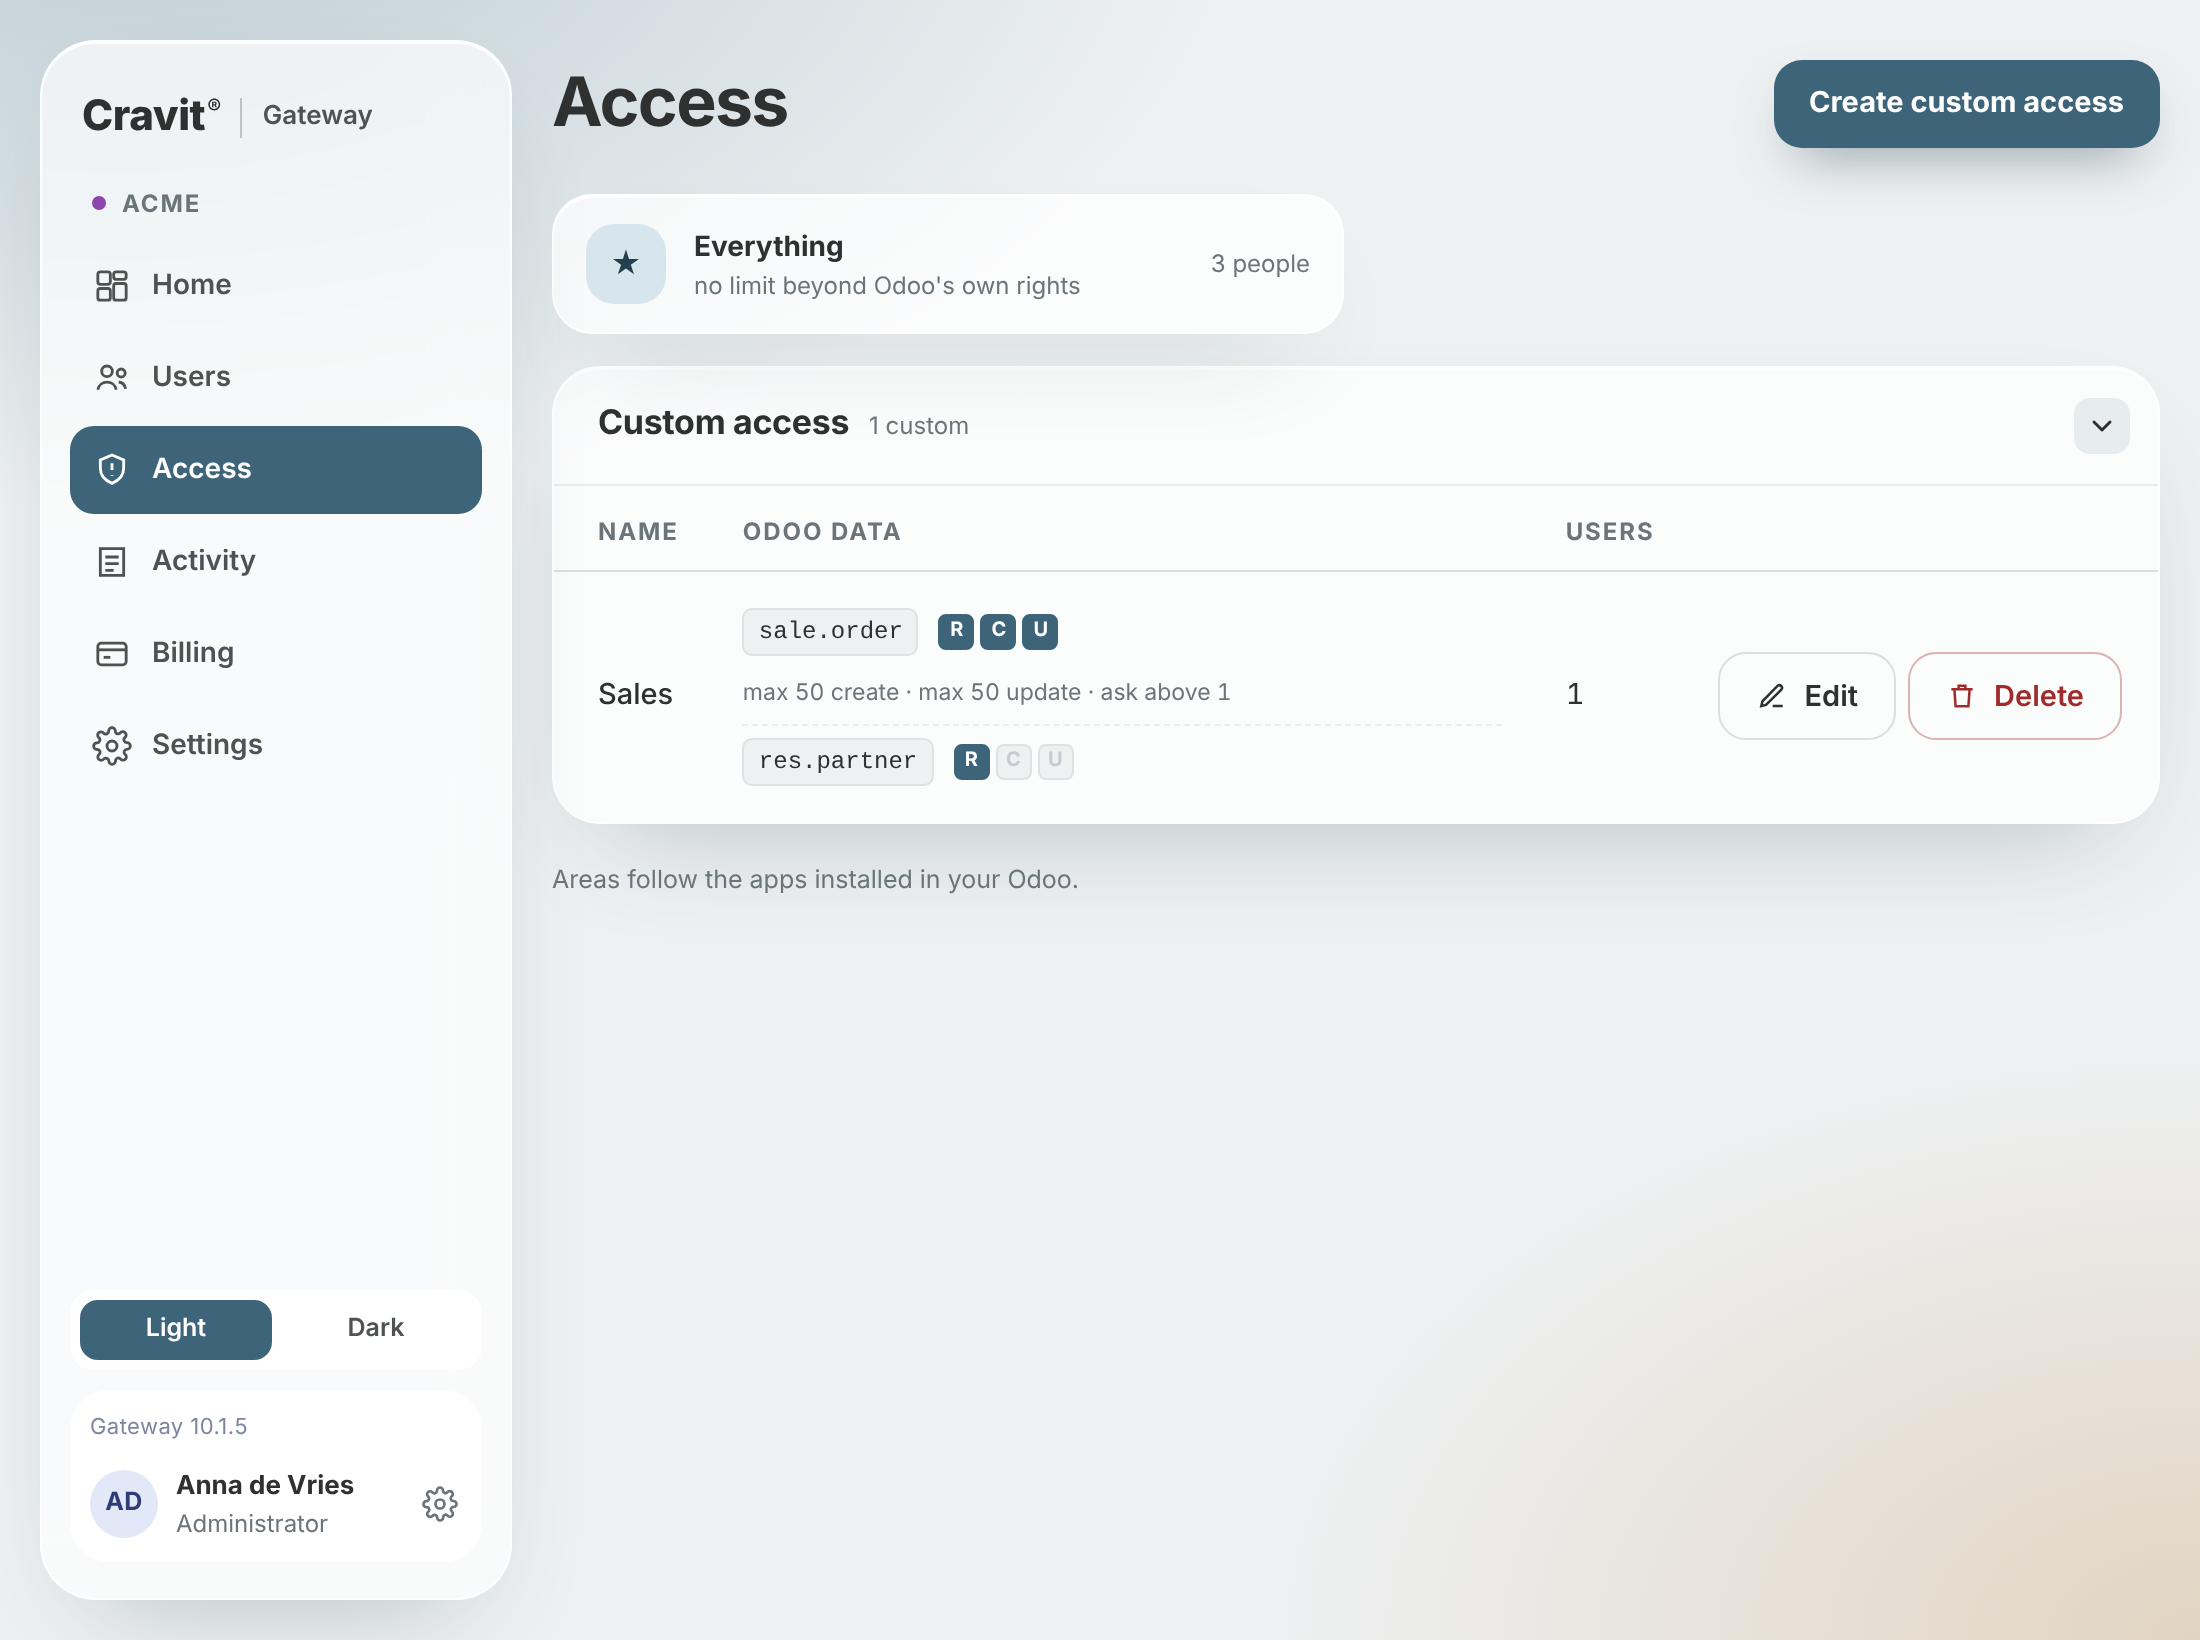
- Sales quotes, orders, customers, leads · Finance invoices, bills, payments · Purchasing · Inventory incl. manufacturing · Projects incl. timesheets · HR · Contacts · Everything: no limit beyond Odoo's own rights.
- Areas follow the apps installed in your Odoo once a browsing login is connected (optional, under the area editor).
Open an area to see exactly which Odoo data it covers, in plain words and with the technical name. You can add or remove data, and set how many records one change may touch and when the AI must ask first. An adjusted area is marked customised; Reset to standard puts it back.
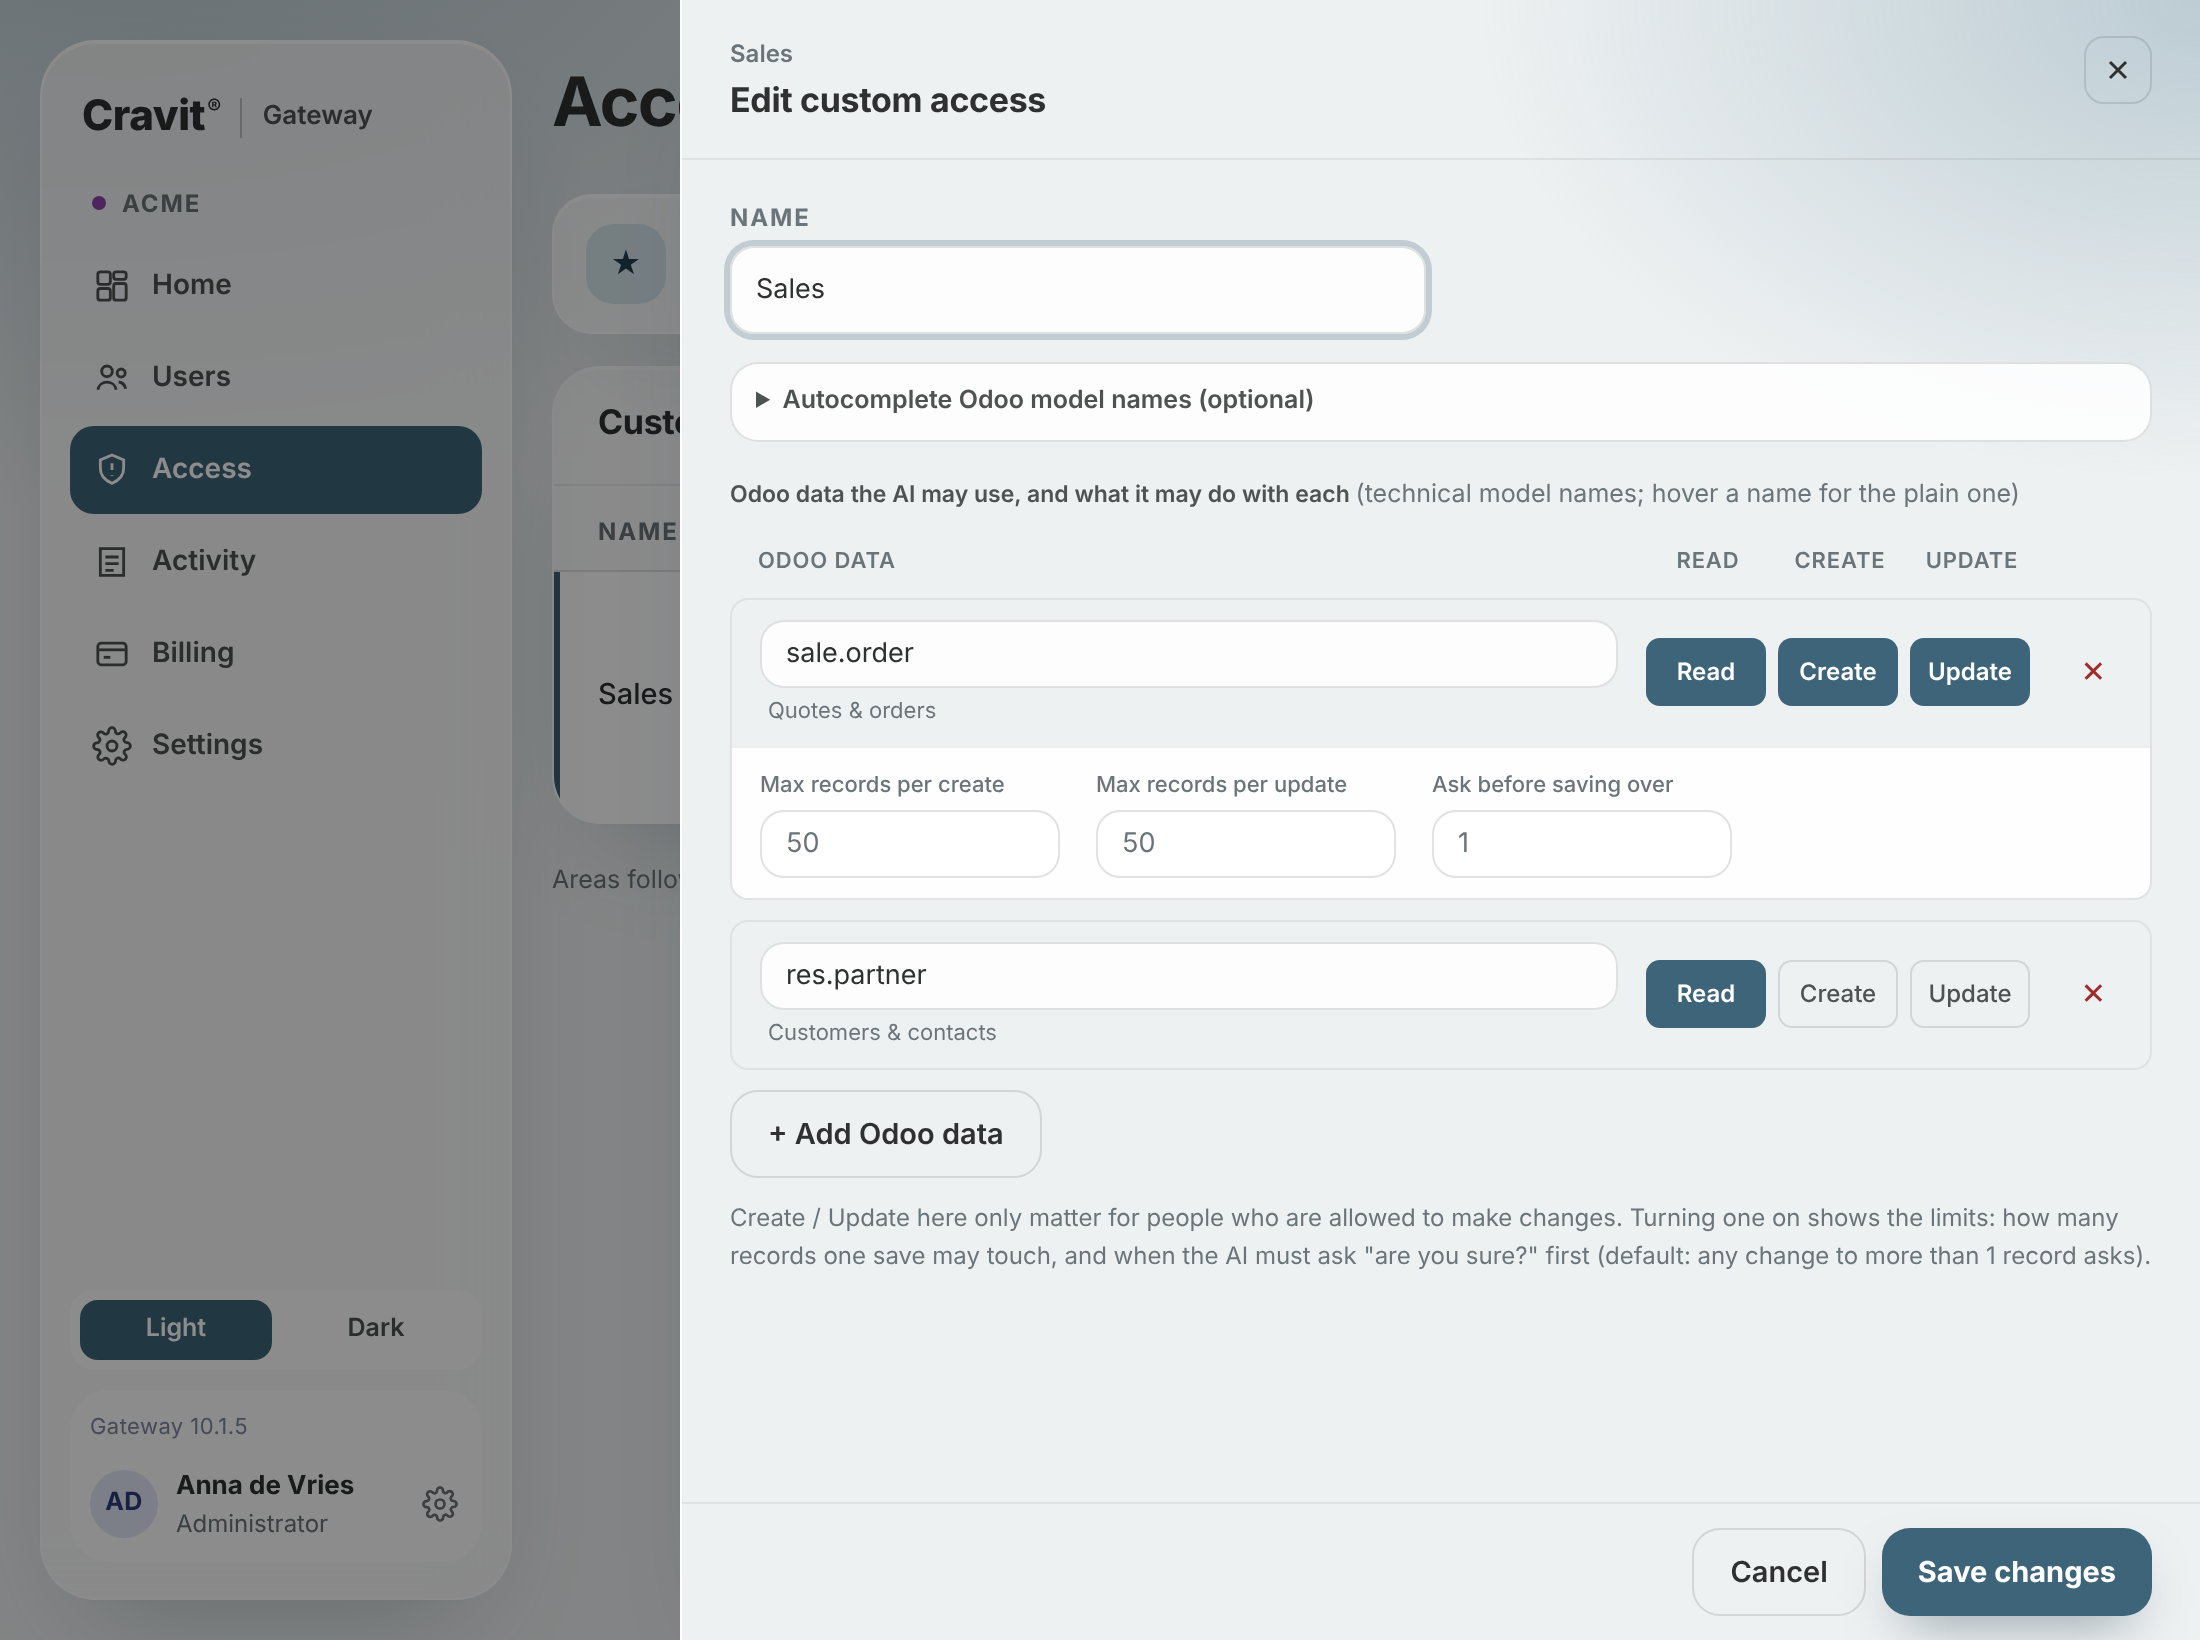
Custom access is for custom modules or stricter rules: start from scratch, name it, and list the Odoo models yourself. Access you created before this version is kept there unchanged, under the names you gave it.
An area says what the AI may see; Allow changes? on the Users page says whether it may change anything. A person with changes set to No can never write, whatever their area allows.
7. Checking what happened
Every request, allowed or refused, with who made it. Nothing can be edited or deleted.
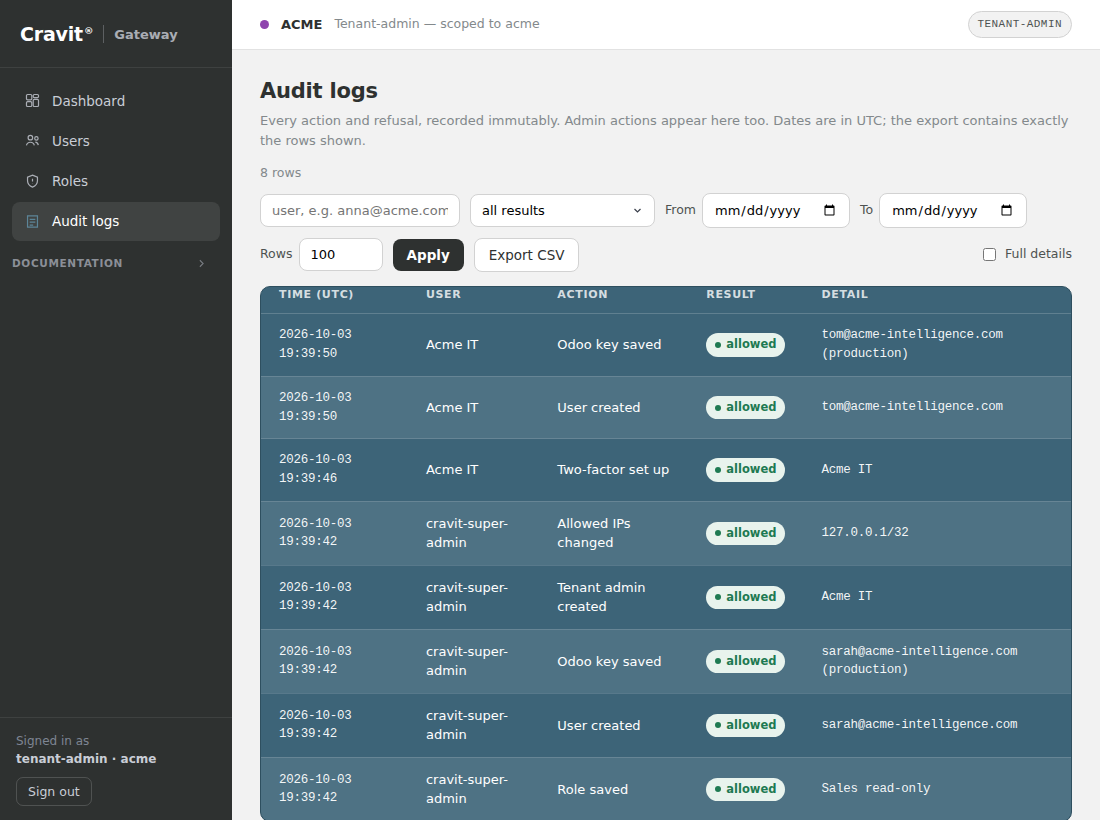
Open Activity. Filter by person, result, Odoo (live or staging), data (for example Invoices) and date (UTC). Full details shows the records involved; Export CSV downloads the rows shown. "Pending confirmation" means the AI paused to ask, not a refusal.
8. Billing
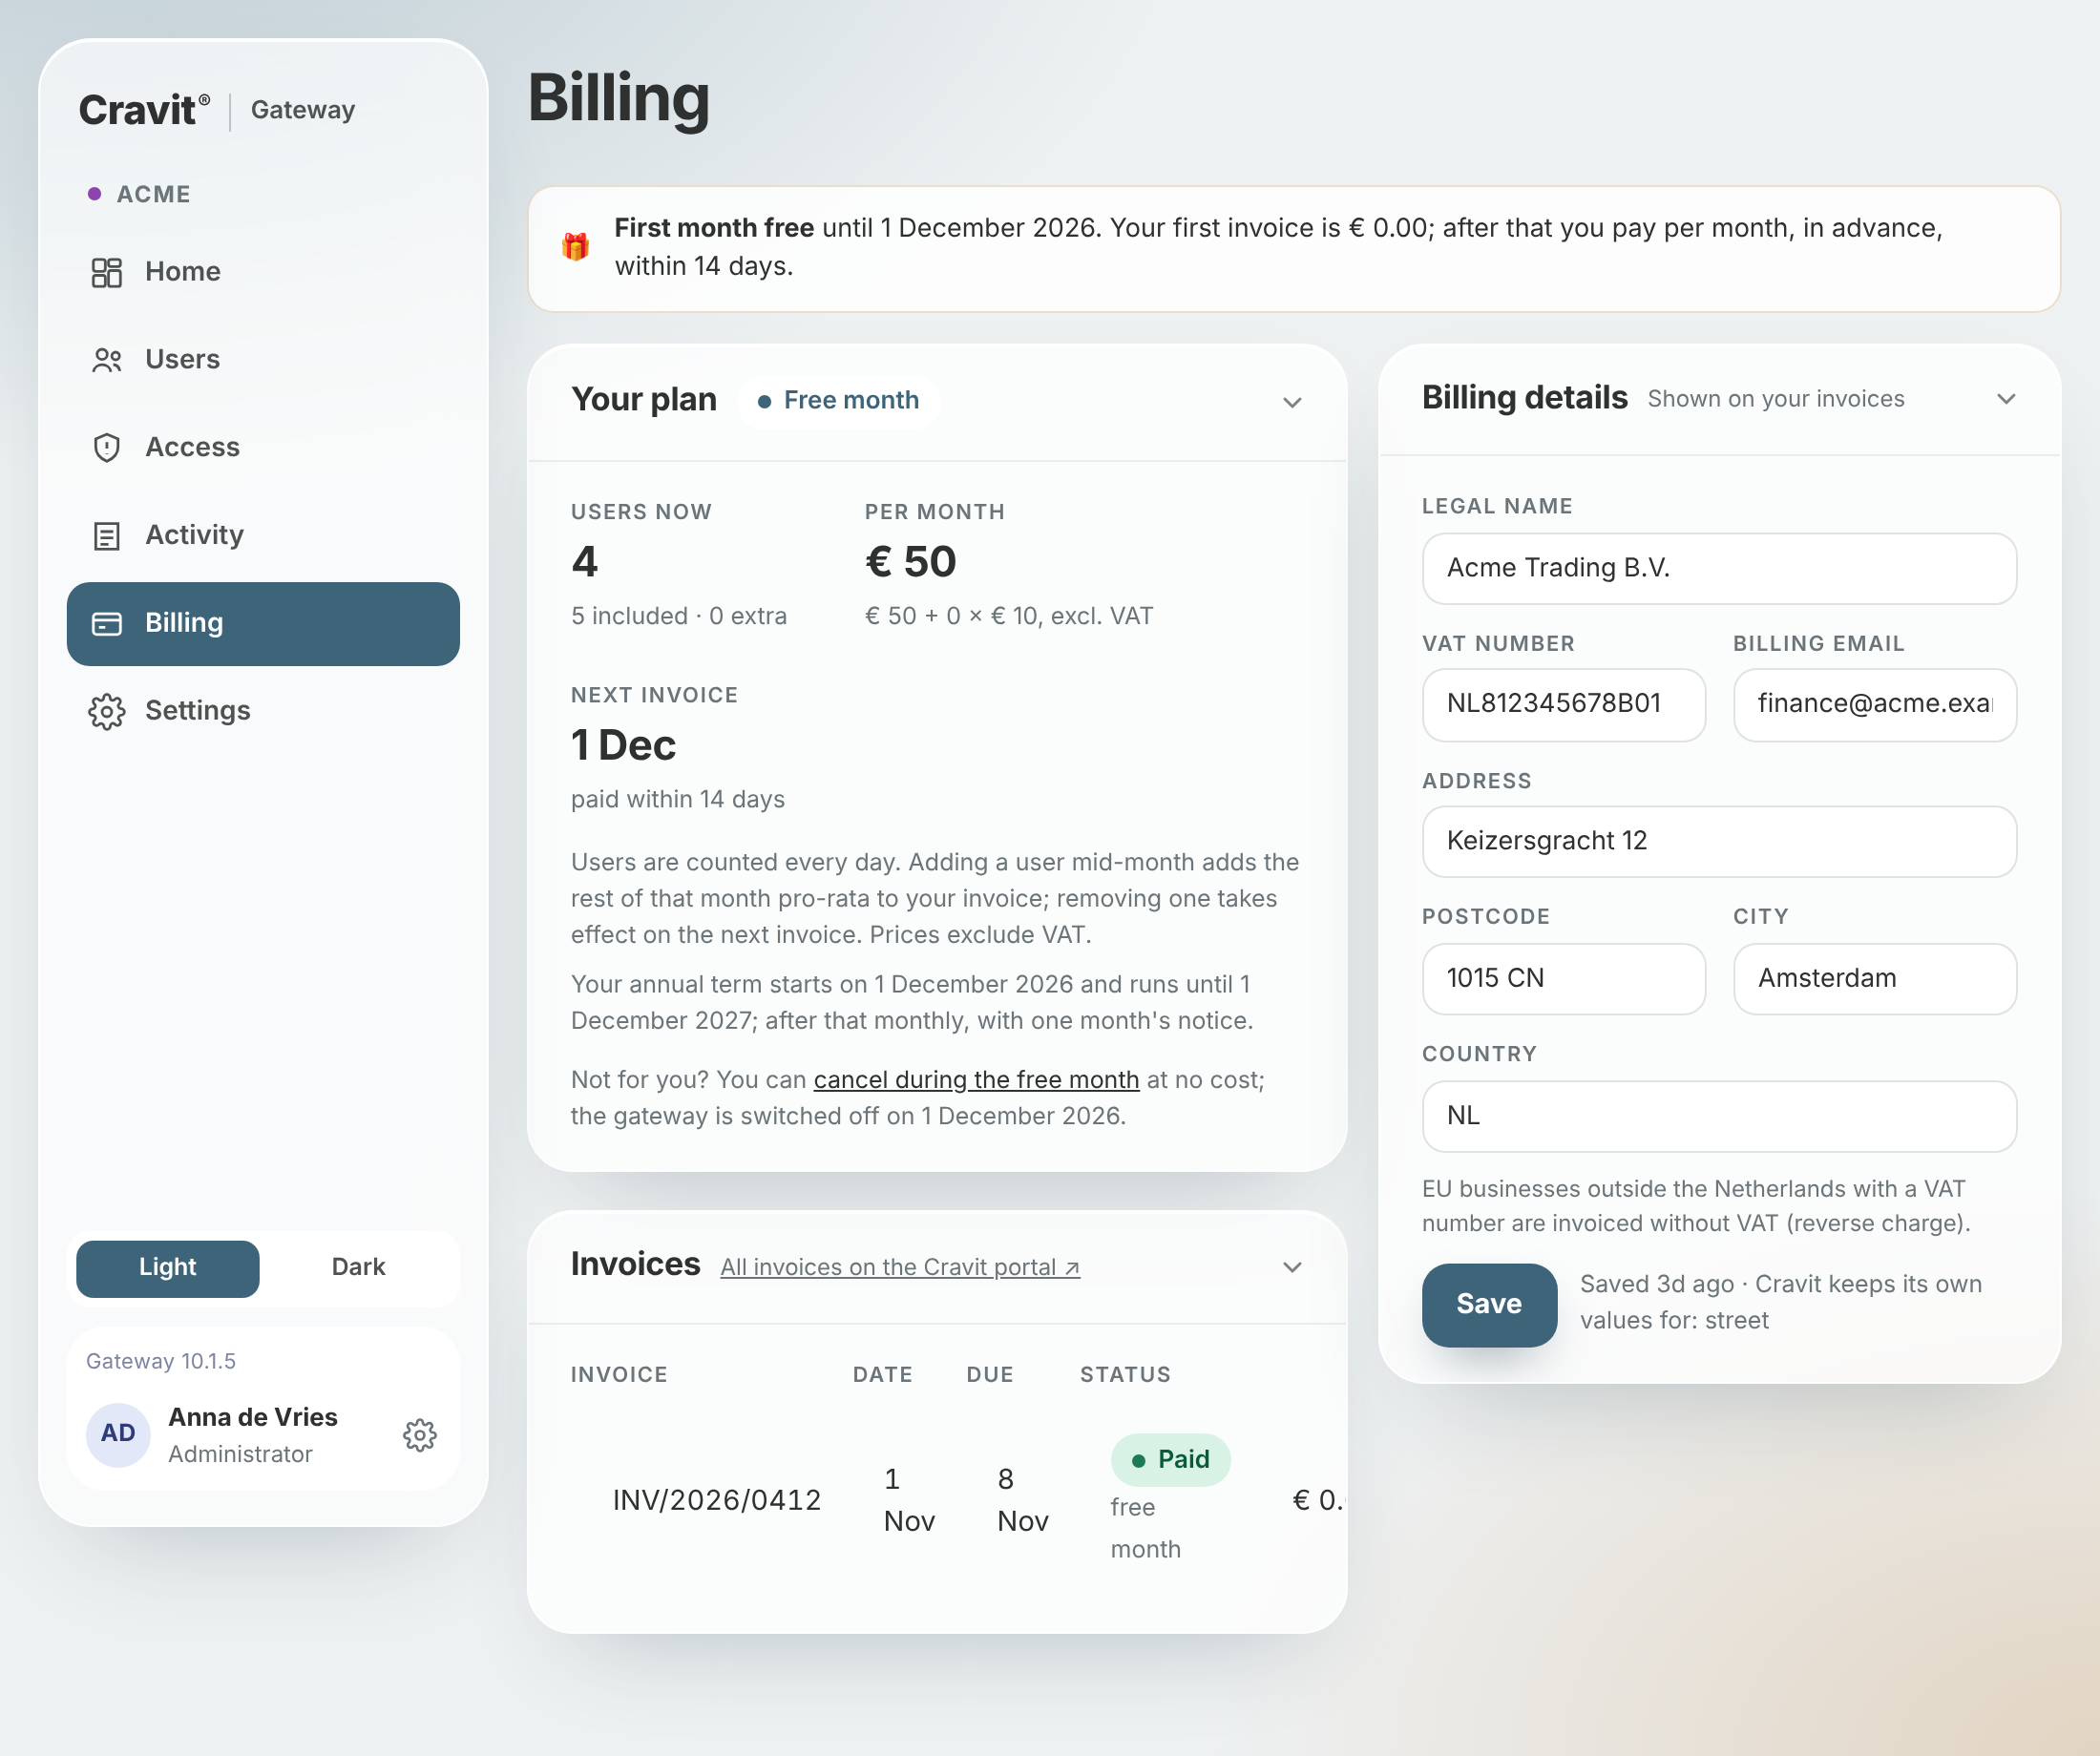
- Your plan: the users you have today, how many are included, and what the next month costs (a base amount per Odoo plus an amount per extra user, excl. VAT). Users are counted once a day. Adding a user mid-month adds the rest of that month pro-rata to your invoice; removing one takes effect on the next invoice.
- First month free: your subscription starts the day your gateway is created and the first invoice is € 0. From the second month you pay per month, in advance, within 14 days of the invoice.
- If an invoice stays unpaid: the administrators get one reminder with the date the service would pause. If it is still unpaid 14 days after the due date, the AI assistants of your organisation stop answering (they say so, and point to this page); the console keeps working. Administrators get one notice on the day of the pause and one confirmation when the service is back. Paying the open invoice restores access within a few minutes.
- Invoices: every invoice with its date, due date, status and a Pay or View link that opens it on Cravit's customer portal. Payment works the same way as for any Cravit invoice.
- Billing details: legal name, VAT number, billing email and address, as they appear on your invoices. Details that Cravit already has on file are not overwritten; ask your Cravit contact to change those.
- Your term: the annual term starts when the free month ends and runs for a year; after that monthly, with one month's notice. The page shows both dates.
- Not for you? During the free month you can cancel on this page at no cost: the gateway stays on until the free month ends and is then switched off; nothing is invoiced. The full terms are at cravitgateway.com/terms.
9. Settings
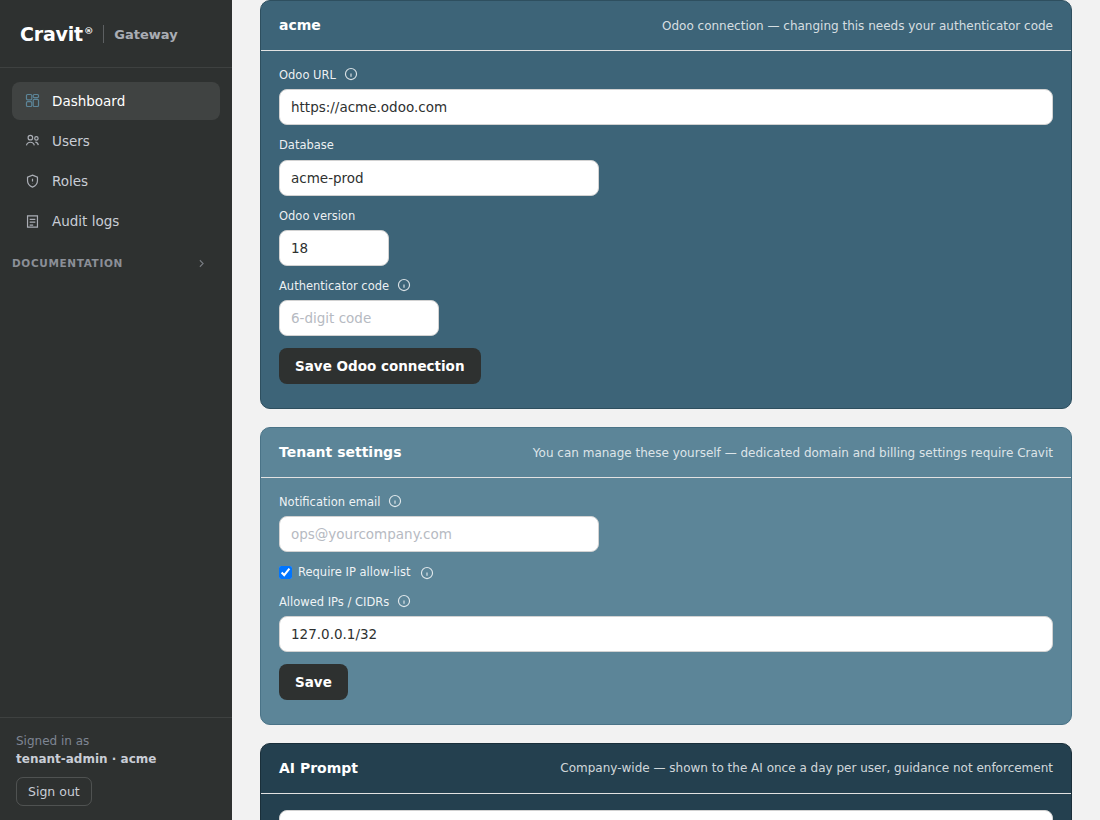
- Odoo: Live Odoo and Staging tabs, each with address, database, version, Test connection and an on/off switch. Saving needs an authenticator code. Switching one off stops every key for it at once; nothing is deleted.
- Notification email: where account notices go.
- Require IP allow-list: administrators may sign in only from the addresses you list. Turn it off if your office has no fixed IP.
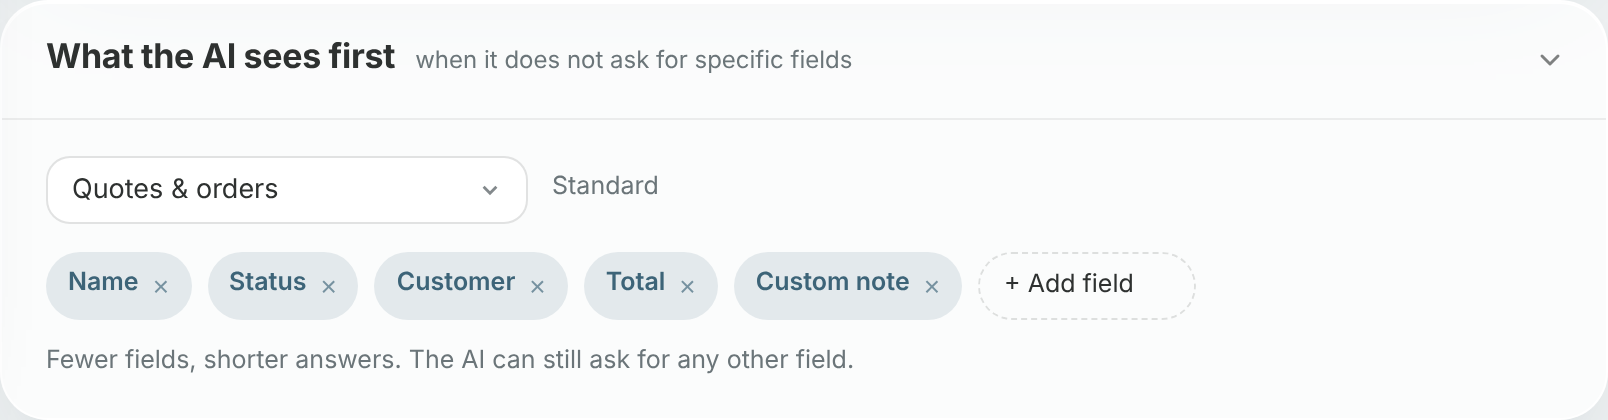
- What the AI sees first: per kind of data, the fields an answer starts with. Remove or add fields; Back to standard undoes it. The AI can still ask for any other field.
- AI Prompt: company-wide guidance the AI sees daily. Guidance only; use Access for anything that must be enforced.
Your portal domain is handled by Cravit; see Getting help.
10. Signing in from now on
Email, sign-in key, then the current 6-digit code. Your session ends when you close the browser or click the gear next to your name (bottom left) → Sign out. Help is in the same menu.